
Home Theater AV Receiver Setup: Step by Step Guide
SEP 24, 2024 | LAST UPDATED ON SEP 24, 2024 BY VIBHAV SINGH
Are you feeling stuck while doing the home theater receiver setup? Well, that’s the story of most AV professionals. As technology is rapidly evolving, the complexity of home theater receivers has increased, leading to difficulties at the time of installation. From the frustration of debugging HDMI issues to explaining to your clients why 4K TV isn’t supportive of their old Blu-ray player. But guess what? With this guide we’ve shared some amazing tips from industry experts about AV receiver setup. What better than learning from the experts themselves, right? We’ve also helped you understand how audiovisual design software will 10X your design and planning process. Stay with us till the end as we reveal this amazing tool. Let’s dive into the world of home theater AV receivers!
The all-in-one solution for your AV needs
Transform your audio-visual experience with XTEN-AV.
No Credit Card required
Key Takeaways
- Explore how to organize audio and video inputs for better home theater receiver setup.
- How many channels there are depends on speaker configuration and audio needs.
- Calibration is crucial for optimal sound quality and room acoustics.
- Experts suggest Reading the manual, planning the layout, using the right cables, and calibrating.
- How can an AV design software simplify the design and setup process for home theater systems?
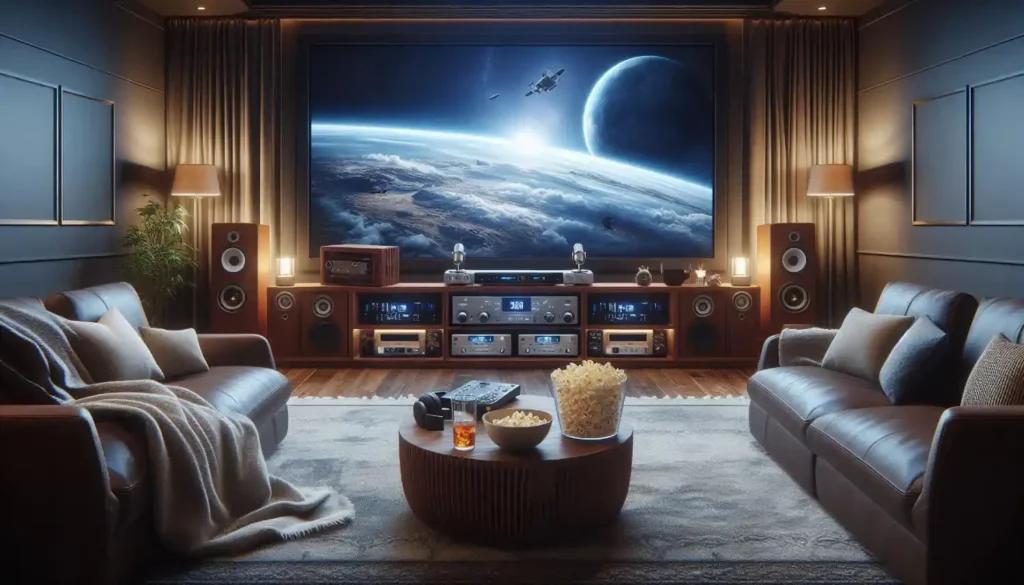
What Does Home Theater AV Receiver Do?
A home theater AV receiver, also known as AVR, helps you in creating a theater-like experience in the comfort of your home. So, technically, what it does is organize the audio and video inputs and outputs so the home theater can easily be controlled. Would you like to understand it a bit deeper? Audio visual receivers just process videos and surround sound to give a better output that is much more enhanced and immersive.
Factors To Consider While Setting Up A Home Theater AV Receiver
As an audio visual expert, you need to understand the requirements of a home theater AV receiver setup before hopping on to the designing or installation part. Let’s understand all the technical aspects to ensure you offer your client the best:
How Much Power Do You Need?
When an AV designer starts the process of setting up a home theater AV receiver, it’s important to understand the power requirements to ensure an immersive audio experience. The key to success is knowing the exact wattage requirements. For this, you’ll have to calculate the power your speakers require to function optimally (which you’ll usually find in the manual). So, there are two major things. The first is RMS (root mean square), it’s the continuous power requirement, and then there is one maximum power that the speakers can handle.
Let’s understand this with an example: You are planning to set up a 5.1-channel home theater with five 80-watt speakers and a 100-watt subwoofer. A receiver with 8- watts per channel (RMS) would be a better choice. On the other hand, if you are planning for a 120-watt speaker, a receiver with 120 watts per channel will give you the desired power.
How Many Channels Do You Need?
Another important factor to consider is the number of channels you need for the right home theater receiver Wiring. First, we need to understand that the number of channels required depends on your speaker configuration and audio requirements. Below, we have listed some of the common channels to help you get an overview:
2.0 channels:
It’s the basic 2-speaker Home theater receiver setup for listening to music or catering to a very small room with two front speakers (left and right). This configuration is ideal for:
- Music listening
- Small rooms or apartments
- Simple TV setups
2.1 channel:
This is just 2.0 with an addition. Here, just a subwoofer is added to the 2.0 channel to enhance the bass response. This configuration is ideal for:
- Music listening with deeper bass
- Small to medium-sized rooms
- Basic home theaters
5.1 channel:
If you’re a fan of surround sound this can be the best fit. 5.1 channel has five full-range speakers with one subwoofer to enhance the overall experience. This configuration includes:
- Front and left speakers
- Center channel speaker
- Surround left and right speaker
- Subwoofer
This configuration is ideal for:
- Home theaters with a dedicated room
- Medium to large-sized rooms
- Immersive movie experiences.
7.1 Channels:
It includes extended surround sound with two additional rear surround channels. This configuration simply adds just two more speakers to the 5.1 channel Home theater receiver setup for an even more immersive experience. This configuration is ideal for:
- Large home theaters
- Immersive movie experience
- Gamers who want a more engaging experience.
9.1 channels:
This channel offers object-based audio with two additional height channels (eg, Dolby Atmos and DTS:X). It is just adding two more speakers to the 7.1 setup. Again, this is just to offer a more enhanced and immersive experience to your clients. This configuration is ideal for:
- Advanced home theater
- Immersive movie experience with height channels
- Gamers who want a more realistic experience.
11.2 channels:
This is called the next-generation audio, with two more channels for even greater immersion. This configuration is ideal for:
- High-end home theaters
- Advanced audio processing
- Future-proofing your setup
Note: Ensure that the receiver you are opting for can support the number of channels. It is also necessary that the speakers are compatible with the desired configuration.
What Connections Do You Need?
If you want to set up a fully functional home theater receiver it’s important for you to know what connections can help you design an optimally running home theater receiver setup. Here’s a rundown of some of the most common connections you will encounter during your home cinema design and research process. Let’s prepare you in advance:
HDMI (High-definition multimedia interface):
This has been the most common connection type so far; it’s used for high-definition video and audio experiences. HDMI cables help you connect your devices like Blu-ray players, gaming consoles, and TV’s.
Optical digital audio:
This connection type is used for surround sound systems and Dolby and DTS:X audio. An optical digital cable plays a vital role in connecting your receiver to the television or other such devices.
Component Video:
So, this is a connection which is not very common these days as HDMI cables have replaced them. Component videos are used for older devices that don’t support HDMI connections. This connection type is only used for old devices like DVD players or gaming consoles.
Coaxial Digital Audio:
This connection type is again not very common as is was used for older devices that don’t have optical digital video. Coaxial digital audio was used to connect the receiver to the television or other older devices.
USB (Universal Serial Bus):
This is a very common connection type that helps you to connect flash drives or streaming devices. A USB cable is generally used to connect your electronic devices to your home theater AVR.
Ethernet:
This is a very important connection type, and ethernet is used to connect your AV receiver to your home network. You will also require an ethernet cable to connect to the router.
Remember the type and number of av cables you require will depend on the client’s requirements. Ensure that you check the devices’ manuals to choose the right connection type.
Features To Look For in an AV Receiver
When choosing a receiver, it’s all about the features! Here are the key ones to look for:
- 4K and HDR Support: Ensure your receiver can handle 4K resolution and High Dynamic Range (HDR) for stunning visuals.
- Dolby Atmos and DTS:X: Get immersive audio with object-based audio technologies.
- Wireless Connectivity: Look for Wi-Fi and Bluetooth for seamless streaming and device connectivity.
- Multi-Zone Capability: Control audio in multiple rooms with zone control.
- HDMI Version: Opt for a receiver with HDMI 2.0 or HDMI 2.1 for the latest features and speeds.
How To Setup a Home Theater AV Receiver?
As an audio video expert, you may feel that home theater AV receiver setup is a hectic task. But here we present you a quick yet detailed guide. Make sure you go through each step carefully. This way you’ll minimize the chances of errors that you may come across otherwise.
Choosing And Buying Your AV Receiver
When you actually start the analysis, it’s very easy to get overwhelmed with the numerous options available in the market. However, as an AV expert, it should be your utmost priority to understand the client’s requirements and plan accordingly before actually making the purchase. As discussed in the above section, you will first have to analyze the channel requirements. When you’ve actually done that, it’s easier for you to choose the right audio visual receiver.
For example, If you’re setting up a home theater with a 5.1 speaker configuration, you’ll need an AV receiver with at least five channels. On the other hand, if you’re planning a more extensive setup with multiple zones, you may need a receiver with more channels. Additionally, consider the type of HDMI ports you need (e.g., 2.1 or 2.0) and whether you require features like wireless connectivity or smart home integration.
Designing the setup with AV diagramming tool
Now that you have chosen your audio video receiver, it’s time you explore the next step, which is designing an Home theater receiver diagram for the full setup. This is actually where things might get tricky, especially if you’re new to the industry or your principles are not clear yet. This is where AV designing tools like X-DRAW come into the picture. An incredible tool that simplifies and automates your design process.
With X-DRAW, you can create AV receiver setup Diagrams. Now, you’ll ask why AutoCAD or Visio should not be used instead. Yes, you can use those tools as well, but why not opt for specific tools where that follow AVIXA guidelines, and you get literally everything from elements to BOM at your fingertips?

AV Design Mastery + Winning Proposals = 10x Productivity!
- Automatic Cable Labeling & Styling
- 100+ Free Proposal Templates
- Upload & Create Floor Plans
- 1.5M Products from 5200 Brands
- AI-powered ‘Search Sense'
- Legally Binding Digital Signatures
No Credit Card Required
How To Connect Your Kit to an AV Receiver?
Now it’s time to actually put everything together. When it comes to connecting speakers to your AV receiver, you generally have just two options that are either passive or powered. If you opt for passive speakers, then you’ll require external amplifiers, whereas if you are opting for a powered speaker, they have an in-built amplifier.
Now that you have this knowledge, let’s get started with the process:
- Keep the amp powered off to avoid any damage or pops.
- Identify the labeled connections on the back of the amp (you may find color codes that make it easier to connect)
- Match your speakers, subwoofer, and sources to the corresponding connections.
- Note that some terminals like surround sound backs or height speakers can double up for Dolby Atmos speakers- look for “assignable” or “extra SP” labels.
- Double-check for connections and TADA!! You’re done with the first major step.
Calibrating your AV receiver
Calibrating is a very important step that you should never miss, and this ensures you’re delivering optimal sound quality to your clients. This process is all about customizing the receiver according to the home theater speakers and room acoustics. There are various ways you could do it. One is manually, or else you can opt for tools like Audyssey or YPAO.
Here’s a guide on how you should do it:
- Plug in the setup- mic and run the auto-calibration. This way, you can measure your speakers and room, which will help you in setting the distances and levels.
- Follow the guide presented to you on screen and run its course.
- If you have Dolby Atmos speakers, tell the amp before calibrating. Specify if they’re upward-firing or ceiling-mounted, and input your room’s ceiling height.
- Set your subwoofer’s volume control halfway and adjust after calibration.
- Double-check speaker settings in the menu, tweaking distances and levels as needed. Trust your ears – if it sounds wrong, adjust away!
You’ve finally completed the home theater AV receiver setup. Just make sure to check all the connections and fine-tune again. As we said, trust your ears and instincts, and you’re good to go.
Tips By Industry Experts for A Smooth AV Home Theater Receiver Setup
Setting up a home theater can definitely be a tough task, but with this guide, we hope it becomes a breeze for you. Here, we bring to you some amazing tips that we received from experts. Hoping this could help ease your struggles.
Tip 1: Read The Manual
We know we’re suggesting the same boring tasks. But ensure you take the time to read manuals. This will save you hours of frustration in the long run. An expert said that they had skipped the manual and were struggling to get the HDMI to work. Soon, they realized that a quick overview of the manual could have saved him days of struggle.
Tip 2: Plan your room layout
Before you actually start connecting the cables, take a step back and visualize the room. This way, it’s easier for you to choose the placement of your speaker, TV, and seating. A well-planned layout can simplify a lot of your tasks and help you provide a better sound experience to your clients.
Tip 3: Use the Right Cables
It’s amazing how often AV experts actually skimp off cables, only to suffer from poor sound and picture quality. We suggest you invest in high-quality HDMI cables that can actually back up the demands of 4k or HDR content. And obviously, as an expert, you should know the importance of cables!!
Tip 4: Calibrate your Speakers
Speaker calibration is often overlooked in the setup process. But trust us it’s as crucial as it could be for achieving the right sound. You can undoubtedly use the receiver’s built-in calibration tool to get the optimal sound dispersion.
Tip 5: Use the Right Audio Settings
It’s common for AV professionals to assume that the default audio settings on your AV receiver are optimal. We suggest you keep experimenting with different audio modes to ensure you’re offering the highest sound quality to your clients.
Conclusion
And there you have it! With this guide, you’re now equipped with the knowledge for the right home theater AV receiver setup that will definitely help you impress your clients. Remember the key to a smooth setup is choosing the right equipment, connecting your kit correctly, calibrating your receiver and using the right cables, and once again, trusting your ears and instincts to ensure optimal sound experience.
But we know that home theater receiver setup and designing is a complex task for many AV integrators. That’s why we recommend using an AV specific design software like XTEN-AV to help you plan and visualize your system. Why waste time when you can book a demo session with our experts or get a 15-day free trial?
Frequently Asked Questions
Connect your sources (TV, Blu-ray, etc) via HDMI to the receiver’s inputs and your video and audio to the receiver’s inputs. Connect your speakers to the receiver’s outputs with the speaker wire. Set up your remote and adjust the sound to your liking.
A good amplifier needs power. It doesn’t matter what the amplifier can do if the power source can’t deliver. Powered or active speakers have built in amplification, passive speakers need an external amplifier, like an AV receiver or dedicated power amp.
Stereo receivers are for music, and home theater receivers are for TV and movies. Home theater receivers have surround sound, multiple channels, and AV features, which makes it perfect for a full entertainment experience.
A good home theater receiver depends on your budget and needs. Consider power output, features (HDMI ports, Bluetooth, etc.), sound quality and brand reputation. Some popular brands are Denon, Yamaha, Sony, and Onkyo.
A home theater receiver (AV receiver) ties everything together in your system. It sends signals between sources (TV, speakers, media players etc) and processes them for better picture and sound.