








How to Choose Projector Screen Size: Chart, Distance & Room Fit
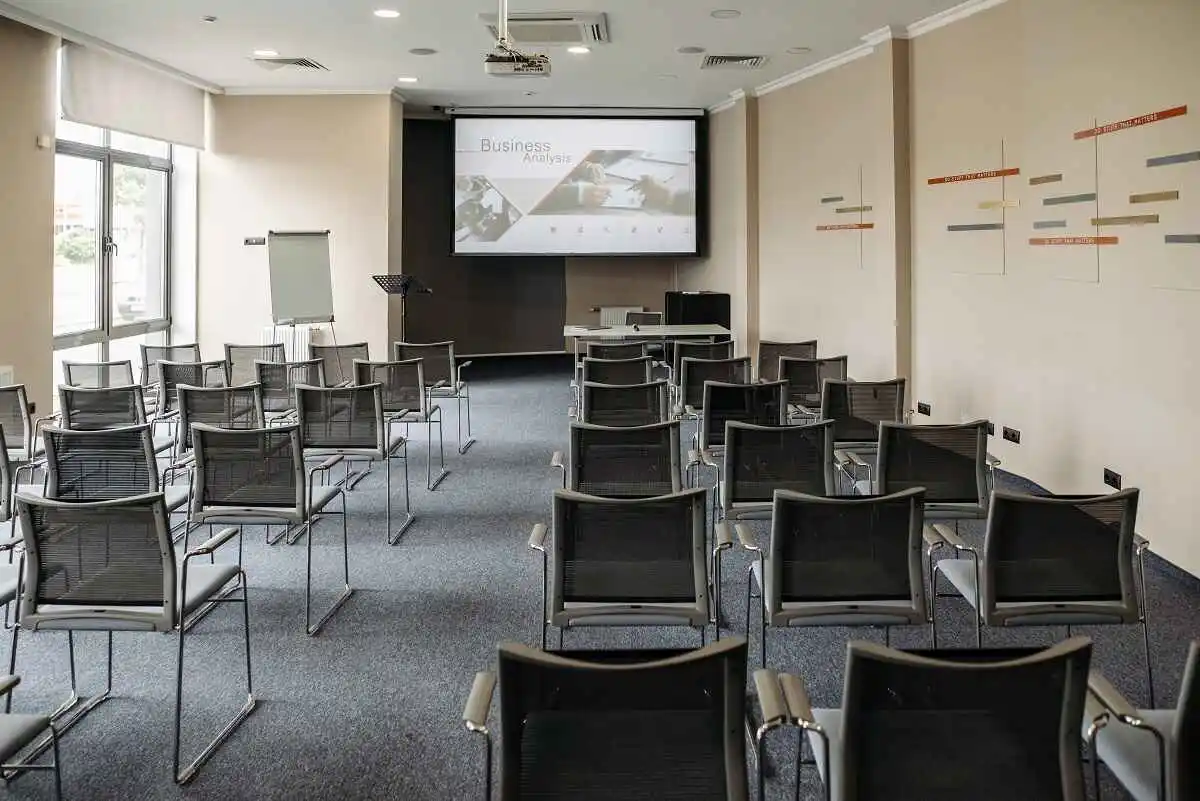
Choosing the projector screen size is not about fitting the largest screen on a wall. When it comes to AV room design, the screen needs to support clear text readability, comfortable viewing angles, audience sightlines, image brightness without creating eye strain, dead space, or installation limitations. In this context, AV professionals typically validate screen dimensions, viewing distance, room depth, aspect ratio, projector throw ratio, ceiling height, audience seating, screen material and projector placement.
Ever set up a projector and still felt the image didn’t look right, even though everything was correct. The problem often lies with the projector screen size. When the screen is too small, content feels cramped and hard to read and when it is too large, the image gets dimmer. The details also become softer and the audience struggles to see everything clearly. In real AV environments, balancing screen size is a crucial aspect. Even small miscalculations can affect how good the image looks. To eradicate these problems, AV professionals validate screen size and other related parameters early in the design phase to ensure reliable, accurate and room-appropriate projection setups. AV professionals can also use a projector calculator to estimate the right screen size and placement before finalizing the decision.
Here, XTEN-AV steps in to streamline the process by enabling AV teams to calculate projector screen size, validate placement and make sure the screen size fits well within a unified AV design.
Optimize Your Residential AV Designs with automated calculations and ready-to-use design templates
The all-in-one solution for your AV needs
Transform your audio-visual experience with XTEN-AV.
No Credit Card required
AV Design Mastery + Winning Proposals = 10x Productivity!
- Automatic Cable Labeling & Styling
- 100+ Free Proposal Templates
- Upload & Create Floor Plans
- 1.5M Products from 5200 Brands
- AI-powered ‘Search Sense'
- Legally Binding Digital Signatures
No Credit Card Required
Key Takeaways
Most users think that projector screen size includes only diagonal measurement, but proper AV planning should consider including width, aspect ratio, usable screen area and height.
What determines the best projector screen size includes viewing distance, room depth, seating arrangement, content type, and projector throw ratio, not personal preference.
A projector screen can be too big if the image loses brightness, pixels become visible or the projector cannot fill the screen from the available throw distance.
Choosing the right screen material depends on image brightness, ambient light levels, room environment and viewing angle.
XTEN-AV helps AV teams validate screen size, throw distance, brightness and room fit before installation.
What Size Projector Screen Do You Need for Your Room?
The starting point for selecting a projector screen size is the room itself and especially the distance between the screen and farthest viewer. Hence, it can be said that projector screen size depends on viewing distance. This distance is known as the primary reference point for estimating a screen that is big enough for clear visibility while still maintaining comfortable viewing from all seating positions. Viewing distance affects ideal screen size as the content should be read with any obstruction. In AV room designs, screen size is first estimated from viewing distance and then validated against ceiling height, room width, projector throw ratio and seating rows, projector brightness so that image remains clear and can be viewed from every seat.
How Screen Size Is Derived and Validated/Projector Screen Size Calculation Rules:
Use Case | Formula/Rule |
Quick screen size estimate | Viewing distance (feet)x 10-12= diagonal inches |
16:9 screen sharing | Seating distance (inches)x0.6149=diagonal inches |
Throw distance calculation | Throw distance = screen width x throw ratio |
Screen diagonal calculation | Diagonal= √(width² + height²) |
Viewing comfort rule (4/6/8 rule) | Max viewing distance = 4x, 6x or 8x screen height) |
Let’s understand with Real-World AV Example: Conference Room Projector Screen Size Calculation
Imagine you are designing a medium-sized corporate conference room for hybrid meetings.
Room Details:
- Room depth: 24 ft
- Farthest viewer distance: 20 ft
- Ceiling height: 9 ft
- Content type: Presentations, spreadsheets, Teams/Zoom meetings
- Screen format: 16:9 widescreen
- Projector throw ratio: 1.6:1
- Seating layout: 2 rows of conference seating
Step1: Evaluate projector screen size
Screen Size (Diagonal Inches)=Viewing Distance (ft)×10 to 12
Minimum recommended size = 20×12= 200-inch screen
Step 2: Validate using 16:9 formula
Diagonal inches= viewing distance (inches) x 0.6149
240 x 0.6149 = 147.5 inches
AV designers will recommend a 150-inch 16:9 projection screen and this is considered realistic for conference room, readability and projector brightness performance.
Step 3: calculate screen width
A 150-inch screen has approx width = 130.7 inches (10.9ft) and height = 73.5 inches (6.1ft)
Step 4: Validate projector throw distance (This is also useful when you are unsure (how far a projector should be from the screen).
Throw distance = Screen width x Throw ratio
10.9× 1.6 = 17.4 ft
So the projector should be mounted approximately 17.4 ft away from the screen
Step 5: Validate Viewing Comfort
Maximum viewing distance = 4x, 6x or 8x screen height Screen height = 6.1 ft
- 4× rule → 24.4 ft
- 6× rule → 36.6 ft
- 8× rule → 48.8 ft
Since the farthest viewer is at 20 ft:
- the room stays within comfortable AV viewing limits
- text readability remains high
- eye fatigue is minimized
However, in professional AV system design, screen size alone is never enough, and AV integrators also validate against several factors to keep content readable, maintain comfortable viewing and the projector fits well inside the room.
What Size Projector Screen Do You Need for Your Room?
Yes, a projector screen can be too big for a space. While larger screens create a more immersive experience, an oversized projector screen can reduce viewer comfort, decrease perceived brightness and make content difficult to read if the room setup, projector brightness or viewing distance are not properly matched. Projector screen size needs to match room depth for comfortable viewing.
Projector screen size affects audience visibility. So, AV designers should check whether the selected screen supports clear viewing from both the nearest and farthest seating positions.
Listed below are some common signs which shows that a projector size is too big:
- Viewers sitting too close to the screen and excessive head and eyes movement
- Text becomes hard to read
- 1080p content appears soft or pixelated
- Projector throw distance cannot fill the screen
- Ceiling height cannot support the installed screen height
- Audience sightlines are blocked
- Brightness drops across the image
- Early Decision Insight
Determining how large the screen should be for the available space should be the earliest decision in AV room planning. Bigger is not always better because we know that if it exceeds the room’s viewing experience, it can negatively affect viewing experience.
For example, a 120-inch projector screen may work well in a medium-sized meeting room with proper throw distance and adequate projector brightness. However, the same screen in a smaller room can hamper readability for presentations and detailed content.
What Viewing Angle Should You Use for Projector Screen Size?
A comfortable projector screen keeps the image within a 30° to 40° viewing from the main seating position. Viewing angle determines comfort and immersion because it controls how much of the field of the view the screen occupies. Smaller angles can feel less engaging, while larger angles may cause excessive eye movement.
As per SMPTE, a 30° viewing angle is good for comfortable viewing, while THX recommends wider angles for a highly immersive viewing experience. However, in AV room setup, the best angle depends on room purpose, seating position and projector setup and content type.
Viewing Angle | Best For | Screen-Size Meaning |
30° | Standard comfortable viewing | Balanced |
36° | Immersive viewing | Recommended for cinematic impact |
40° | Highly immersive | Suitable for viewers who prefer larger images |
Above 40° | Risky/Preference Based | Maybe too large for smaller rooms |
Viewing angle planning is integrated into a projector calculator to help AV designers estimate screen size based on audience positioning, improving screen sizing accuracy while helping validate room fit, seating comfort, and projector placement.
Are Projector Screens Measured Diagonally?
Yes, projector screen size is measured by its diagonal from one corner of the viewable screen area to the opposite corner, just like TVs. AV professionals also measure screen width, screen height, aspect ratio, and screen area as these dimensions make sure that the screen fits the room and perfectly matches the projector’s throw ratio and resolution.
How do you measure projector screen width?
When it comes to measuring a projector screen width, the frame can be measured directly with a tape measure or simply calculate it mathematically using the screen’s diagonal and aspect ratio. For example, a 16:9 widescreen width is approximately 87 percent of the diagonal.
Mathematical Calculation
If you know the diagonal measurement of your projector screen (e.g., 100”) and aspect ratio approximately (16:9), the width will be:
Screen width: Diagonal X 0.87
Example for a 100” screen: 100”X0.87=87” wide
How do you measure projector screen height?
Calculate the screen height: Diagonal X 0.495
So, for a 100” inch screen: 100” X 0.495 = 49.5” (4.1 feet)
How do you calculate diagonal screen size?
Use Pythagorean theorem to calculate the diagonal size
D= √(width² + height²)
If we take an example of a screen which is 105 inches wide and 59 inches high:
D= √105²+59² = 120 inches
How do you convert projector screen size from inches to feet?
Convert inches to feet by dividing the measurement by 12.
For example, if you want to convert 150 inches screen size= 150 inches/12= 12.5 feet
Projector Screen Size Chart by Aspect Ratio
Aspect ratio determines the relationship between screen width and height. Projector Screen dimensions may vary by aspect ratios and therefore, you will see that a 100-inch 16:9 screen and a 100-inch 4:3 screen will have different dimensions. So, it is crucial for AV professionals to compare both width and height before finalizing screen size.
16:9 Projector Screen Dimensions
Diagonal | Width | Height | Width in Feet | Best Use |
80 in | 69.7 in | 39.2 in | 5.8 ft | Small-sized rooms |
100 in | 87.2 in | 49.0 in | 7.3 ft | Home theatre/small meeting rooms |
120 in | 104.6 in | 58.8 in | 8.7 ft | classrooms / conference rooms |
150 in | 130.7 in | 73.5 in | 10.9 ft | Training rooms/churches |
200 in | 174.3 in | 98.1 in | 14.5 ft | Auditoriums/large venues |
16:10 Projector Screen Dimensions
Diagonal | Width | Height | Width in feet | Best Use |
80 in | 67.8 in | 42.4 in | 5.7 ft | Presentations |
100 in | 87.4 in | 52.9 in | 7.1 ft | Business conference rooms |
120 in | 101.7 in | 63.6 in | 8.5 ft | Corporate training rooms |
4:3 Projector Screen Dimensions
Diagonal | Width | Height | Width in feet | Best Use |
80 in | 64.0 in | 48.0 in | 5.3 ft |
|
100 in | 80.0 in | 60.0 in | 6.7 ft | Education setups |
120 in | 96.0 in | 72.0 in | 8.0 ft | Training rooms |
Note: These values are not fixed technical standards. They are practical AV planning ranges.
100-Inch Projector Screen Dimensions
A 100-inch projector screen dimensions depend on aspect ratio:
- 16:9 screen: 87.2 × 49.0 inches
- 16:10 screen: 84.7 × 52.9 inches
- 4:3 screen: 80 × 60 inches
120-Inch Projector Screen Dimensions
A 120-inch projector screen dimensions depend on aspect ratio:
- 16:9 screen: 104.6 × 58.8 inches
- 16:10 screen: 101.7 × 63.6 inches
- 4:3 screen: 96 × 72 inches
Projector Screen Size in Feet
To convert projector screen size from inches to feet, divide the width or height by 12.
For example, a 120-inch 16:9 projector screen is about 8.7 feet wide.
How Do You Calculate Projector Screen Size from Seating Distance?
To calculate Projector screen size from seating distance, measure the distance from the main seating position to the screen and apply a viewing-angle or screen-height rule. Follow a simple rule for quick planning, many rooms use 10-12 inches of screen diagonal for every foot of viewing distance and then validate throw distance and brightness.
Viewing/Seating Distance | Suggested Screen Size | Best Use |
8 ft | 80-100 in | Compact rooms |
10 ft | 100-120 in | Small meeting rooms/home theatres |
12 ft | 120-135 in | Classrooms/conference rooms |
15 ft | 150-160 in | Training rooms |
20 ft+ | 180-200 in+ | Large rooms/auditoriums |
Note: These values are not fixed technical standards. They are practical AV planning ranges.
What Is the Best Viewing Distance for Each Projector Screen Size?
The best viewing distance for a projector screen depends on factors like screen size, content detail and viewer comfort. When it comes to detail-heavy content or analysis, viewers need closer seating. While general video or presentations paves the way for farther seating.
4/6/8 Rule Box
A simple guideline usually used in AV planning:
- 4× Screen Height: Detailed content (Images, spreadsheets, analysis)
- 6× Screen Height: Large text/slides
- 8× Screen Height: video, movies, passive viewing
With this rule, AV planners can balance clarity and comfort when choosing seating distance.
Which Aspect Ratio Should You Choose for a Projector Screen?
Choosing a projector screen aspect ratio for a projector screen should be based on what type of content you’re showing. For HD video and video conferencing, 16:9 screen size ratio can be used, 16:10 is perfect for business and education presentations and 4:3 for legacy content, and 2.35:1 for cinematic home theatre setups works well.
Aspect Ratio | Best For | AV Use Case |
16:9 | HD video, streaming, conferencing | Meeting rooms, home theatres |
16:10 | Business presentations, education | Office, classrooms, training rooms |
4:3 | Legacy content | Legacy AV systems and older classrooms |
2.35:1 | Cinematic widescreen movies | Dedicated home theatre setups |
1:1 |
|
|
What happens if the projector and screen aspect ratio do not match?
If the projector and screen aspect ratio do not match, the image may not fill the entire screen and users may see several issues like black bars, letterboxing or side matting depending on whether the content is wider, narrower, taller or shorter than the screen format. Last but not the least, aspect ratio mismatch creates unused screen space.
Let’s discuss a real AV scenario
In a training room or older classroom, the AV team may replace the screen with a 16:9 widescreen projection screen while the existing projector still shows a 4:3 image. In such a case, you will see that the projected image may not fill the full screen width. There might be some unused space on the left and right sides, creating black bars or side matting.
On the other hand, if the ultra-wide video content is being shown on a 16:9 screen, the image will have bars at the top and bottom. This will give an awful viewing experience because the screen seems underused, presentation text may appear small and the design of the room may not match the expectation of viewers. Apparently, AV designers need to check the native’s aspect ratio, type of content and room use case before selecting the right projector screen size.
How Does Projector Resolution Affect Screen Size?
Projector resolution affects how large a screen can be before the image looks soft, pixelated or less detailed. Projector resolution affects pixel visibility because lower-resolution images can appear softer on larger projector screens.
A 4K projector can usually support a larger screen or closer seating distance than a 1080p projector because it displays more image detail and keeps visuals, graphics and text sharper.
However, resolution doesn’t decide the physical screen size by itself, it is affected by throw distance, projector lens, zoom range, placement and aspect ratio.
Projector Resolution | Screen-Size Impact | AV Planning Note |
720p | Works well on smaller screens | Image may look soft quickly |
1080p | Can support medium to large screens when viewing distance is enough | Seating distance should be checked |
4K UHD | Well-suited for larger screens and closer seating as the image stays sharper | A perfect consideration for large rooms and detailed visuals |
WUXGA/16:10 | Supports business, education and presentation-heavy rooms | Useful for dashboards and slides |
How Does Screen Material Affect Projector Screen Size?
Screen material affects projector screen size by controlling how much light is reflected from the screen and how evenly the image performs in the room’s lighting conditions. Screen material directly affects brightness and contrast, especially in rooms with ambient light or larger screen sizes.
A matte white screen gives balanced brightness and wider viewing angles, making it a perfect choice for meeting rooms, classrooms and spaces with wider seating layouts. ALR screens help maintain image brightness and contrast in rooms with significant ambient light, while gray screens improve perceived contrast and rear projection screens are useful when the projector stays hidden behind the screen.
Screen Material | Best For | Size/Brightness Impact |
Matte White Screen | Controlled-light rooms | Provides neutral brightness & color accuracy. Works better for standard screen sizes, but larger screens may require a brighter projector |
Gray Screen | Rooms where contrast is needed | Can improve black levels and perceived contrast |
ALR Screen | Ambient-light rooms | Minimize washed out images in brighter rooms, making screen highly usable in lit rooms |
Acoustically Transparent | Auditoriums or rooms where speaker is placed behind the screen | Useful for theatre-style AV setups, but some light loss may arise and so, projector brightness needs to be planned carefully |
Rear Projection | Hidden projector setups | Requires rear space and proper screen material. Larger sizes may need more projector brightness and installation depth. |
Understanding real AV Use Case
In a corporate training room with ceiling lights and a 150-inch screen, a matte white screen may make the image appear washed out during presentations. So, an AV integrator may choose an ALR screen so the projected image stays brighter and easier to read without completely darkening the room. If we talk about an auditorium or theater-style AV setup, an acoustically transparent screen may be selected so speakers can be placed behind the image, but the projector brightness must be planned carefully because some light can be lost through the screen material. Rear projection is useful in commercial spaces where the projector needs to stay hidden and where foot traffic in front of the screen could otherwise create shadows.
Does Projector Type Affect Screen Size and Screen Material?
Yes, Projector type affects compatible screen material and screen size. Standard throw, short throw, ultra-short throw and rear projection setups use different placement distances and may need different screen surfaces to avoid hot spotting, distortion, image washout, uneven brightness. The right choice depends on room depth, screen size, projector throw ratio, and viewing conditions. The right choice depends on room depth, screen size, projector throw ratio and viewing conditions.
Projector Type | Screen-Size Impact | Screen Material Note | |
Long Throw |
| Works with many standard projection screens, including matte white screens. | |
Short Throw |
| Needs a flat or tensioned screen surface | |
Ultra Short Throw | Sits close to the screen and a large image can be created even from a few inches or feet away. Strong choice for classrooms, huddle rooms, and interactive spaces. | often needs UST-compatible or ALR material to avoid distortion
| |
Rear Projection | Projector is placed behind the screen | Needs rear projection screen material. Shadows can be avoided caused by people walking between the projector and screen. |
For example, In a small classroom or huddle room, AV integrators usually compare short throw vs long throw setups because there is not enough room depth for a long throw setup. In such a case, they go for a short throw or ultra-short throw projector. However, these projectors need a flat, tensioned, or UST-compatible screen as a wavy pull-down screen can make the image look distorted.
Additionally, for lobbies or simulation rooms, rear projection is widely preferred when the projector needs to stay hidden or when people may walk in front of the display area.
How Does Screen Size Affect Projector Brightness?
A larger projector screen needs more brightness as the light is spread over a bigger surface area. If there are not enough lumens for your chosen screen size and room lighting, the image may look dim, washed out or low in contrast. This is the reason many users ask, how many lumens do I need for a projector before finalizing the screen size.
Brightness Planning Guide by Projector Screen Size
Screen Size | Brightness Risk | Recommended Action | |
80-100 in | Low to moderate | Check ambient light, projector lumen and screen gain | |
120 in | Moderate | Projector lumen should match lighting, screen gain and content | |
150 in | High | use projector brightness calculator to maintain sufficient image brightness
| |
200 in+ | Very high |
|
Note: These values are not fixed technical standards. They are practical AV planning ranges.
How Does Ceiling Height Limit Projector Screen Size?
Ceiling height limits projector screen installation because the screen needs sufficient vertical space for the viewable image area, mounting hardware, stand legs and comfortable audience sightlines. Ceiling height limits installed screen height even when the screen width fits the wall. A screen may fit by width, but it can still be too large if the room does not have enough height.
Let’s understand through an example, a tall projection screen in a low-ceiling room may place the bottom edge too close to the floor or may push the top edge very close to the ceiling, resulting in poor viewing or blocked sightlines. If the projector is mounted overhead, this is where ceiling mounted projector placement guide can help users avoid blocked images or shadows.
Before choosing the screen size, confirm:
Ceiling height: Defines maximum vertical space
Viewable screen height: confirms the projected image fits within the room height
Bottom edge height from floor: Ensures the image is visible above tables or seated audience
Mounting hardware: Adds extra height above or around the screen
Stand or leg height: Useful for floor-standing projector screens
Projector beam path: Helps avoid obstruction
Doors, windows and wall obstructions: Prevents screen placement issues
Audience sightline: Confirms full screen can be seen comfortably
What Projector Screen Size Works for Different Audience Sizes?
Audience size affects projector screen size because the farthest viewer must be able to read text and see visuals clearly without eye strain. Audience size affects recommended projector screen dimensions. For small meeting rooms, smaller screens work well like tripod screens, while conferences, auditoriums, churches or large events with larger audience usually need larger screens with higher brightness and careful placement such as fastfold screens.
Audience Size | Suggested 16:9 Screen | Suggested 4:3 Screen | Best Use |
Up to 50 | Approx. 80-100 in diagonal | Approx. 6’ x 8’ range | Meeting rooms |
Up to 100 | Approx. 5.5’ tall x 10’ wide | Approx. 6′ tall × 8′ wide | Training rooms/small events |
Up to 200 | Approx. 7′ × 12′ | Approx. 7.5′ × 10′ | Conferences/classrooms |
Up to 300 | Approx. 9′ × 16′ | Approx. 9′ × 12′ | Large meetings rooms/worship spaces |
500 + | Approx. 11.5′ × 20′ | Approx. 10.5′ × 14′ | Auditoriums/large venues |
How Does Room Type Change Projector Screen Size?
Room type changes projector screen size because audience distance, seating layout, ambient light, content type, and installation method vary between classrooms, conference rooms, home theatres, churches, auditoriums, and outdoor setups. Larger rooms usually need larger screens, but the screen must still match viewing distance and projector throw capability.
Choosing the Right Projector Screen Size for Different Room Types
Conference Room: The common projector screen size range is 80-120 inches. The main limitation is readable text and slides, so the screen needs to be large enough for proper visibility without overwhelming the room. Using a projector calculator can help you match the screen size with room depth, seating distance and projector placement before finalizing the setup.
Classroom/Training Room: For such space, the ideal screen size falls between 100-150 inches. The main constraint is student visibility and ambient light, so the projector needs to support readable text mainly in rooms with windows or ceiling lights. AV teams can opt for a brightness calculator to determine the right projector lumens for clear image quality in a bright environment.
Home Theatre: For a home theatre, the typical screen size range is 100-150 inches. Some of the main constraints are immersion and comfort, so the screen should be large enough to create a cinematic feel. Proper home theatre projector placement helps align screen size, projector position, seating distance for a streamlined viewing experience.
Church/Worship: For such space, the preferred screen size is generally 150 inches or larger. The main restraint is farthest viewer visibility, especially for sermon slides, live video feeds and announcements. Hence, the screen must support clear viewing across a larger area. A lumens guide can help select the right projector brightness for large spaces where lighting conditions and long viewing distances can minimize image clarity.
Auditorium: The screen size is typically 200 inches or bigger. Constraints like brightness and throw distance, so the projector needs to be selected on how far it will be placed from the screen and how much brightness is required to ensure image clarity. Checking auditorium throw distance helps ensure the screen, projector, and lens work together to give comfortable viewing from the front row to the back row.
Outdoor Setup: The usual preferred screen size is 120 inches or larger. Ambient light and screen material are known as some of the biggest constraints. Thus, the setup needs to account for surrounding glare and the reflective quality of the screen. Using a brightness calculator helps estimate the projector brightness needed for better outdoor visibility.
Which Projector Screen Type Should You Choose?
Choose projector screen type based on installation method, room use, required image flatness, portability, budget, and lighting conditions. Fixed frame and tab-tensioned screens work best for permanent AV rooms, while portable and manual screens work better for temporary setups.
Projector Screen Types at a Glance
Screen Type | Image Flatness | Best For | Installation Note | AV Use Case |
Fixed Frame | Very high | Dedicated rooms | Permanent wall mount | Conference rooms/dedicated home theatres |
Motorized tab-tensioned
| Very high | Premium rooms | Powered wall or ceiling mount | Boardrooms, training rooms |
Motorized non-tensioned | Medium | Flexible rooms | Powered mount | Offices, classrooms |
Manual pull-down | Medium | Budget rooms | Wall or ceiling mount | Classrooms, compact meeting rooms |
Tripod / portable | Medium | Temporary setups | No permanent install | Events, mobile presentations |
Rear projection | Specialized | Hidden projector setups | Needs rear space | Command centers/commercial installs |
What Projector Screen Size Mistakes Should AV Teams Avoid?
The most common projector screen size mistakes are choosing by diagonal size only, ignoring viewing distance, using the wrong aspect ratio, overlooking ceiling height, forgetting projector throw distance, choosing the wrong screen material, and selecting a screen that is too dim for the room’s lighting conditions.
Check the list below to proper understand projector screen size mistakes that can affect readability, brightness, placement, and final AV proposal accuracy:
Choosing only by diagonal size: A larger diagonal does not guarantee a better viewing experience. Screen width, height, room dimensions, and seating distance needs to match the space and content type.
Ignoring screen width and height: The screen may fit by diagonal size but fails due to wall width, ceiling height or mounting clearance. AV teams need to verify actual width and height so that the screen properly fits the wall and viewing area.
Ignoring nearest and farthest viewer: If viewers are in very close proximity to the projector, the image may feel overwhelming, while distant viewers may struggle to read content. Use viewing distance to confirm readable image height for the farthest seat.
Using 16:9 when content is mostly 16:10: If the screen aspect ratio and content type doesn’t match, it can lead to unused screen space or scaling issues. Choose the screen aspect ratio with the main content source and room use case.
Choosing a screen too large for projector brightness: Larger screens spread light over a bigger area, reducing image brightness. Opt for a brightness calculator to match screen size, projector lumens and room lighting.
Ignoring ceiling height: A screen may fit horizontally but still lack enough vertical clearance. Ceiling height affects mounting space, screen positioning, and comfortable viewing angles.
Using non-tensioned material with UST projectors: UST projectors are sensitive to waves which can lead to distorted images. Ultra-short-throw projectors require perfectly flat, fixed frame or UST compatible screen material.
How Can XTEN-AV Calculate Projector Screen Size for AV Rooms?
XTEN-AV helps calculate projector screen size for AV rooms by validating the screen diagonal, aspect ratio, width and height details, screen material, screen resolution and projector placement requirements. XTEN-AV calculator calculates screen size and projector placement so AV professionals can validate room fit before installation and this will help AV teams in validating screen size before creating AV drawings, BOMs and proposals.
Select the Screen Diagonal:
Here comes the first validation step as selecting the screen diagonal sets the overall image size. With a screen size calculator, AV designers can estimate the right screen size on the basis of room type, audience size and viewing distance. This way they can choose a screen that not only looks good on paper but also provides clear visibility for the farthest viewer.
Confirm the Aspect Ratio:
After selecting the screen diagonal, AV designers need to check the aspect ratio. It is very crucial because the wrong aspect ratio can lead to issues like black bars, cropping or wasted screen space. At the room/use case planning stage, teams can decide whether the space will support video conferencing, training content, presentations or home theatre viewing.
Check Screen Width and Height:
There is a need to check screen width and height to confirm wall fit. With the floor plan/layout, it can be verified whether the selected screen smoothly fits the available wall space, ceiling height, doors, windows, bottom clearance and other room obstructions.
Validate Throw Distance:
With the help of a projector calculator, Audio visual (AV) system integrators can confirm whether the projector can create the required image size from the available throw distance. This is of utmost significance for ceiling mounted, short-throw, ultra-short throw projectors and in rooms where there is restricted mounting space.
Validate Brightness:
A larger screen spreads projector light across more surface area, making the image look dim if the projector doesn’t have sufficient lumens. With a brightness calculator, AV integrators can match screen size, ambient light and projector brightness to avoid washed out images.
Check Ceiling Height:
AV installers need enough vertical space for the viewable screen area, mounting hardware, stand legs, bottom-edge height, and projector beam path. Adding this validation into project documentation helps avoid installation issues later.
Confirm Screen Material:
Screen material affects contrast, brightness, ambient light performance, and image flatness. During spec selection, they should confirm whether the room needs a fixed frame screen, tab-tensioned screen, ALR screen, UST-compatible material, manual pull-down screen, or portable screen as per the projector type and room lighting.
See how XTEN-AV simplifies projector integration by enabling AV professionals to connect screen size planning, projector placement, brightness checks, equipment details and X.DOC proposals across the AV project lifecycle.
Add Validated Details to the X.DOC / Proposal Workflow
After the screen size, aspect ratio, width, height, throw distance, brightness, ceiling height, and screen material are validated, AV teams can add the approved screen, projector, mount and related equipment into the X.DOC / proposal workflow. AV professionals validate screen size before creating client-ready audio visual proposals in X.DOC. Teams can organize proposal items under Rooms & Items, simply add products to a specific room and have those products appear in that room’s BOM. This way teams can prepare a structured client deliverable.
When teams want to ensure that all product details are up-to-date with your design, syncing BOM products with your proposal ensures that all products are updated. This can be done by navigating to the proposal and then go to the ‘Rooms & Items’ section and click the ‘Sync with Design’ button. Select the room you want to sync and hit the sync button. This allows the team to include the selected projector screen, mount, accessories, product description, pricing details inside a client-ready proposal. X.DOC also supports proposal templates, custom sections, document editing, proposal tracking, and digital signatures, so they can prepare a more complete approval document instead of managing the final proposal manually.
Hence, AV teams can turn validated projector screen details into structured proposals with room-wise items, BOM details, pricing, product descriptions, and client approval options in a hassle-free manner.
AV Design Mastery + Winning Proposals = 10x Productivity!
- Automatic Cable Labeling & Styling
- 100+ Free Proposal Templates
- Upload & Create Floor Plans
- 1.5M Products from 5200 Brands
- AI-powered ‘Search Sense'
- Legally Binding Digital Signatures
No Credit Card Required
Conclusion
Selecting the right projector screen size depends on room size, viewing distance, brightness, aspect ratio, ceiling height, screen material, and projector placement. The utmost priority is to choose a screen that delivers clear, comfortable and room-appropriate viewing for all the viewers. With XTEN-AV, AV professionals can plan projector screen size more accurately by validating room fit, projector placement, brightness and screen material to name a few. Once the details are finalized, teams can sync the approved projector, screen, mount, accessories and pricing details into X.DOC to acquire client-ready proposals.
Ready to choose the right projector screen size for your next AV project? Design smarter projector setups with XTEN-AV.
Frequently Asked Questions (FAQ's)
Yes, you can set up a projector screen yourself for simple rooms by choosing the screen location, measuring screen height, checking wall or ceiling support, confirming projector throw distance, and testing image alignment. For classrooms, conference rooms, churches, or auditoriums, AV teams should validate screen size, brightness, mounting, and cable routing before installation.
A good projector screen size depends on viewing distance, room size, aspect ratio, audience seating, and content type. Common sizes include 100 inches for small rooms, 120 inches for medium rooms, and 150 inches or larger for classrooms, churches, and auditoriums.
Your projector screen should be large enough for the farthest viewer to read content clearly, but not so large that nearby viewers experience eye strain. Start with viewing distance and aspect ratio, then validate screen width, height, projector throw distance, and brightness.
You can determine projector screen size by calculating viewing distance, aspect ratio, room dimensions, screen width, screen height, and projector throw ratio. XTEN-AV’s projector tools help validate screen size and placement before installation.
Yes, the size of the projector screen can be too big if viewers sit too close, brightness drops or there is insufficient space in the room.
For a 10-foot viewing distance, screen size of 100-120 inch works well. Choose a 100 inch screen for small-sized rooms and a 120 inch screen can be chosen for small meeting rooms/ home theatres where immersions are crucial.
Most conference rooms usually opt for 120–125-inch screen for presentations and video meetings. However, it is still crucial to consider room depth, ceiling height, text readability and seating layout.
Yes, screen size affects projector brightness. As the screen gets bigger, the same light is spread across a bigger surface area which can make the image appear dimmer. Due to this, larger screens need higher projector lumens, better control feature and suitable screen gain for better quality image.
Yes, projector resolution affects screen size and this is because larger screens make the details more visible. A higher-resolution projector, such as 1080p or 4K can support bigger screens with sharper text and visuals. Lower-resolution projectors may look soft or pixelated when stretched across a large screen.
Choose 16:9 for widescreen presentations and video conferencing as it matches modern content formats. Choose 2.35:1 for cinematic home theaters to enjoy immersive cinematic widescreen movies with minimal black bars.