


How to Choose the Right NVR Security System for Your Client’s Project Installation?

Sahil Dhingra
Published 22 October 2025
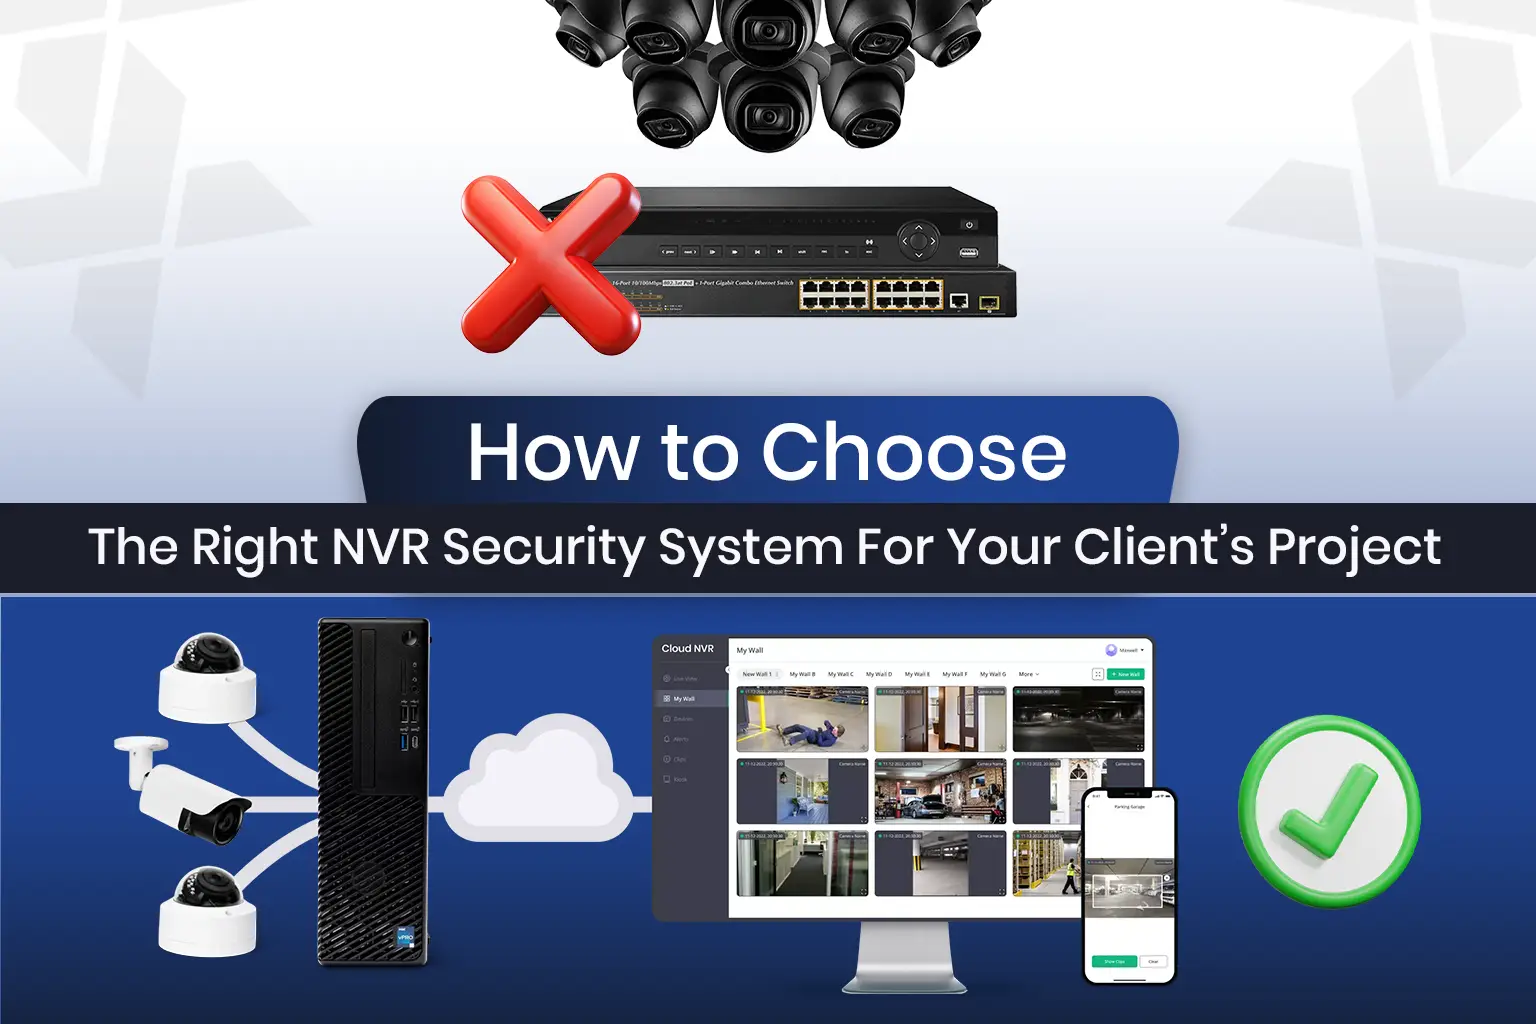
Selecting the right Network Video Recorder (NVR) is not about buying the most expensive security model. It is, in fact, about finding the perfect match for your client’s specific security requirements.
An ill-fitted NVR can leave your high-end cameras as glorified paperweights. But the right NVR can create an optimal security setup. NVR is at the center of a surveillance setup and manages and stores video footage from IP cameras.
Hence, sometimes choosing the right NVR system can be as difficult as brain surgery. This is why we bring you a comprehensive guide on selecting NVR security system for installation. With this guide, you will be able to set up the NVR systems on your client’s projects.
This guide provides information on the essential components of the NVR security system. It includes information on how to calculate the correct storage size and retention. It also teaches about the importance of camera‑recorder compatibility and ONVIF compliance.
Keep reading to learn all about how to choose the right NVR security system and boost client satisfaction.
Key Takeaways
- Selecting an NVR is about matching your client’s needs. It is essential that you establish compatibility with cameras, ensuring the storage is sized correctly and meets ONVIF compliance. All these factors collectively ensure a reliable, long-lasting performance.
- An ideal solution with an NVR would be a PoE IP camera and versatile Cat5e/Cat6 cables. Ensure compatibility through ONVIF profiles and vendor certifications to prevent functionality gaps during deployment.
- Plan for correct channel inputs, PoE budgets, and camera support. Overprovision by at least 20% for future growth, and ensure accurate sizing of enterprise storage drives to avoid replacement.
- Use bit-rate, resolution, and recording time to calculate storage needs. Add safety headroom, RAID, and future expansion to avoid data loss or costly upgrades.
- Calculate camera wattage and bit-rate to size switches correctly. Maintain network and power headroom to support peak load and future scalability.
- Tools like X-DRAW, X-DOC, and X-PRO automate system design, proposals, and installation workflows. These solutions reduce errors and streamline project delivery.
- Support redundancy, firmware updates, and hybrid cloud storage for remote access and long-term archives. Clear policies ensure system reliability and client satisfaction.
The all-in-one solution for your AV needs
Transform your audio-visual experience with XTEN-AV.
No Credit Card required
What components matter most when choosing a commercial‑grade NVR system?
When choosing a commercial-grade NVR system, a few components matter more than the others. These components are PoE IP Cameras, network cables, and Network Video Recorders (NVR).
Additionally, you must ensure that the NVR system meets four essential criteria. The criteria include enough camera channel inputs and a matching PoE budget (or switch ports). They also comprise storage drives with accurate dimensions and camera compatibility (ONVIF/vendor).
Meeting these criteria ensures optimal installation. It also avoids issues like insufficient PoE camera channels and camera brand incompatibility. Thus, you can prevent costly re-work or client dissatisfaction on your project.
Here’s the breakdown of essential components and criteria for your better understanding.
PoE IP Cameras
You must connect the IP cameras to the NVR system via Ethernet cables while installing them in your commercial project. It allows Ethernet cables to provide power and data connections to each security NVR camera via PoE technology. Thus, you can end the use of external power sources for the cameras.
Network Cables
Cat5e or Cat6 Ethernet cables are another critical component of commercial-grade NVR systems. These cables connect each IP NVR camera to a centralized spot where the NVR is set up. Hence, you can build a closed circuit network specifically for the security system.
Network Video Recorder (NVR)
The NVR is the core or central hub of the commercial‑grade NVR system. It acts as a recording device for the security system. While installing them into the system, you must connect them to a router via an Ethernet cable.
As a result, the recorders can access the same network which have IP NVR security cameras connection. As a result, the NVR finds out the location of cameras on the network and creates a connection with them.
Camera channel inputs
You must match the NVR channel inputs to the total camera count plus extra capacity. The NVR channels are foundational blocks for recording and analytics performance. You must leave room for more channels for future scalability. The extra headroom ensures you don’t have to replace the NVR or license upgrades.
You must also ensure that the channel count aligns with requirements. The alignment prevents frame drop and stream limitations under peak loads.
Matching PoE budget (or switch ports)
You must calculate PoE power draw based on camera specifications at peak load. This ensures that the switch ports deliver wattage (power) above the total camera demand with a safety margin. You must also create spare PoE ports to support future expansions and simplify ongoing maintenance cycles.
Storage drives with accurate dimensions
You should calculate storage requirements using bitrate, resolution, compression codec, and retention duration. You must install enterprise-rated HDDs or SSDs. These storage drives are reliable for managing high-write workloads seamlessly.
You must also verify if the drive bays support U.2, SATA SSD, or enterprise HDD dimensions before installation. Precise dimensions prevent conflicts while installing the tray, backplane, or chassis during deployment.
Camera compatibility (ONVIF/vendor)
You must verify camera compatibility through ONVIF compliance and vendor-certified compatibility lists. You must also consult the manufacturer’s documentation for various aspects. These aspects include tested firmware versions, supported models, and feature sets.
Inconsistent protocol implementations can disrupt video streams, PTZ controls, or audio functionality unexpectedly. But vendor-certified compatibility can reduce troubleshooting time. It can also ensure reliable operation during maintenance cycles.
How do you calculate the correct storage size and retention for your client’s footage needs?
You must determine the correct storage size and retention for your client’s footage needs using a precise formula. You must carry out all the calculations before any installation. You can calculate the storage requirements easily. All you’ve to do is multiply the camera count by the daily recording seconds, retention days, and average bitrate per camera.
Once done, you’d have to convert megabits to terabytes and add a safety margin for growth. You must always leave at least twenty percent headroom and check RAID or hot-swap options for better scalability.
Then, verify total bays and expansion options for future camera additions. You must review client compliance requirements for the smallest retention before finalizing storage architecture.
With that said, let’s understand the calculation of the correct storage size better.
Suppose you’ve to calculate storage requirements for 10 cameras at 4Mbps each, recording 24 hours daily. You’ve to save the recording for 30 days as per the client’s need. So, the total storage you’d need will be roughly around 32 terabytes.
Let’s understand how:
Let’s calculate the total recording seconds in a day, which amounts to 24*60*60 = 86400. So, the total number of recording seconds in a month will be 30*86400 = 2592000.
With 10 cameras, the total number of recording seconds becomes 2592000*10 = 25920000. Each camera writes 4mbps or 4,000,000 bits (4*1000*1000 = 4,000,000).
So, the total storage of the recording will be 25920000 * 4000000 = 103,680,000,000,000 bits or 12.96 TB (terabytes). For 12.96 TB, convert 103,680,000,000,000 bits to bytes first.
Then, convert it to TB by using the conversion units, which is 1TB = 10^12 bytes. So, the calculation will be 103680000000000/8 = 12960000000000 bytes or 12.96 TB since 1 TB equals 1012 bytes.
Rounding the total storage to 13 TB and adding 20% headroom, the total storage amounts to 15.6 TB (13+{13*20/100} = 15.6 TB. Now, let’s take RAID redundancy or future growth into account. So, the total storage equals 15.6 * 2 = 31.2 TB, which we can round off to 32 TB for safe headroom.
Now, let’s go through what each component means for better understanding.
Frame rate
You should understand how frame rate directly affects storage consumption and bandwidth. Recording at 15 fps (frames per second) halves storage usage compared to 30 fps.
You must align the frame rate with the project’s needs. The needs may include smooth playback for motion analysis or forensic detail. You then balance frame rate reductions against acceptable visual quality and analytics performance. You always document choice rationale to support client requirements and budget.
Codec choices (H.264 vs H.265)
You must choose between H.264 and H.265 codecs as per compression efficiency and compute resources. H.265 Codec offers up to 50% better compression than H.264 at equal quality levels.
You must verify that both cameras and the NVR support the chosen codec. It will help you ensure that the NVR security system avoids transcoding overhead. You then balance codec complexity against system CPU or GPU capacity. You always test sample footage to confirm storage savings without quality loss.
Scene complexity
You must account for scene dynamics when sizing storage requirements. High-motion environments like parking lots consume more bitrate than static indoor scenes. You must estimate the average motion activity percentage per hour. It will help you adjust the bitrate calculations.
Then, you must factor in lighting changes and weather. You should also factor in the background activities, like foliage or traffic. You always include buffer capacity to accommodate sudden increases in scene complexity.
Over-provisioning best practices
You should plan for at least 20% extra storage post the calculated requirements. It will allow the client to handle future growth. You must also leave at least 5% free space on each drive to optimize write performance and longevity.
Additionally, you must establish monitoring alerts to track usage trends and project upgrade needs well before capacity limits. You must always verify expansion lead times to prevent retention gaps or system outages.
Why is camera‑recorder compatibility and ONVIF compliance critical on client sites?
Camera-recorder compatibility and ONVIF compliance are critical on client sites. It is because mixed-brand installations rely on standardized profiles. These profiles ensure uninterrupted streaming, PTZ control, audio metadata, and event handling.
The absence of proper Profile S, T, or G support can lead to Motion alerts, metadata tagging, and control features not working. Thus, it is essential that you verify the firmware versions and full functionality before deployment. You should also test interoperability with various cameras.
Let’s understand it better:
Understanding the ONVIF Profile S helps in smooth video streaming and metadata exchange. It also streamlines event handling workflows. Profile T adds PTZ controls and audio streaming support alongside secure data transfers.
You must verify NVR compatibility with each camera’s ONVIF profile before system configuration. It will help you avoid unexpected failures. You also need to verify camera firmware against NVR firmware releases. A proper verification and differentiation can help you prevent incompatibility headaches.
Vendor certifications provide lists of recommended camera models and supported firmware versions. You should test two to three different brand cameras within your NVR user interface regularly. This approach uncovers protocol mismatches that could hinder full feature functionality.
Once done, document any interoperability issues. But, you must do the documentation before finalizing equipment selections for client approval. You should also perform interoperability tests during the initial proof-of-concept. It will help you identify hidden limitations during the early stages of the project.
Testing mixed-brand operations verifies that motion events, metadata, and recording schedules execute flawlessly. You should revalidate compatibility after firmware upgrades to avoid unexpected feature regressions on-site.
Ensuring consistent operation across updates reinforces client trust and reduces support calls significantly. You document test results and compatibility confirmations within clear formal project deliverables.
Pro Tip: You must test 2–3 brand cameras in the NVR UI before final equipment lock.
How should PoE power and network bandwidth guide your design decisions?
You must balance PoE power budgets and network bandwidth when designing an NVR security system. First, you should calculate each camera’s power draw. The power draw must range from 5 to 15 W under peak operation.
Then you must estimate camera bitrates accurately. It will help you determine uplink throughput needs for main and sub-stream traffic. Lastly, you must provide at least twenty percent headroom in both power and network capacity.
Planning with bit-rate per stream
You should calculate the uplink needs by multiplying each camera’s bit rate by the total cameras and active streams. Once done, then differentiate between full resolution main streams and lower resolution sub streams for viewing and recording.
After that, you must plan VLAN segmentation to isolate camera traffic. The VLAN segmentation will help you prevent bandwidth contention with other client networks. You need to provide at least 20% bandwidth headroom. It allows the NVR security system to handle peak usage and future codec upgrades.
You should also document calculated bandwidth requirements clearly within your deliverable design. Clear documentation will ensure seamless and fast client approval and auditing.
Selecting the PoE switch type and cascading
You should choose PoE switches based on the total power budget requirements for all cameras. High-density installations often demand 800 W PoE switches for stable operation. You may cascade many 60W switches when large-scale deployments exceed single switch budgets.
Ensure uplink ports between switches can handle aggregated bandwidth without creating bottlenecks. Then, verify switch specifications for IEEE 802.3af and 802.3at compliance before final selection. You should provide at least 20% unused PoE capacity. It will ensure smooth future camera expansions or upgrades.
It is crucial to maintain proper ventilation and rack space. It will allow you to prevent switch overheating under full power loads. You must also document switch staging and cascading diagrams clearly. It will guide the security system integrators & installers in installation and future troubleshooting.
What resolution and frame rate configurations are ideal for commercial safety vs storage balance?
You must balance resolution clarity and storage needs to optimize surveillance performance. Deploy 4 MP or 4K cameras for entry or high-risk areas and 1080p cameras for wide-area coverage. Frame rates of 15–20 FPS offer smooth video without heavy storage demands. Enable H.265 encoding to halve bandwidth and reduce storage by up to fifty percent.
You should check camera placements based on critical detail requirements and network constraints. Mixing resolutions lets you assign 4K cameras to entry or high-risk areas. As a result, you can deploy 1080p cameras in general zones. This hybrid approach reduces storage needs and bandwidth use.
Testing frame rates between 15 and 20 fps ensures acceptable motion clarity and lower data rates. H.265 compression delivers 50% storage reduction compared to H.264 codecs. Thus, you must confirm that all devices support H.265 to avoid transcoding overhead.
Refer to the table below for a quick comparison of configuration impacts on bit-rate and monthly storage requirements.
Configuration | Bitrate (Mbps) | Storage (TB/month) |
1080p @ 15 FPS | 3 | 2 |
1080p @ 30 FPS | 6 | 4 |
4K @ 15 FPS | 6 | 4 |
4K @ 30 FPS | 12 | 8 |
How much support and future-proofing should you plan into your NVR System Design & Installation?
You must select NVR security systems with at least a 3-year manufacturer’s warranty. It will guarantee dependable operation over time. Choose models with RAID or hot-swap drive support and dual power inputs.
You must also select the models that have regular critical vendor firmware updates. These updates should cover continuously evolving encryption and resolution standards across systems. This approach protects against downtime while accommodating future camera format and software changes.
You should install power redundancy with dual PSUs or UPS systems to prevent outages. Maintain detailed OS update logs to track firmware changes and compatibility across components.
Leverage remote health monitoring tools for proactive alerts on disk, network, and power anomalies. Your NVR security system must include built-in monitoring dashboards and automated maintenance reports.
You should confirm firmware compatibility during initial deployment and after any system update. Additionally, you must document vendors that support SLAs. The documentation will help you guide incident response and escalation procedures.
You must also plan for future support and updates. It ensures that your NVR design remains resilient and adaptable. You must always plan for regular vendor-driven security patch cycles.
How can XTEN‑AV help you to Select the Right NVR Security System During the Project?
You must select NVR security systems with at least a 3-year manufacturer’s warranty. It will guarantee dependable operation over time. Choose models with RAID or hot-swap drive support and dual power inputs.
You must also select the models that have regular critical vendor firmware updates. These updates should cover continuously evolving encryption and resolution standards across systems. This approach protects against downtime while accommodating future camera format and software changes.
You should install power redundancy with dual PSUs or UPS systems to prevent outages. Maintain detailed OS update logs to track firmware changes and compatibility across components.
Leverage remote health monitoring tools for proactive alerts on disk, network, and power anomalies. Your NVR security system must include built-in monitoring dashboards and automated maintenance reports.
You should confirm firmware compatibility during initial deployment and after any system update. Additionally, you must document vendors that support SLAs. The documentation will help you guide incident response and escalation procedures.
You must also plan for future support and updates. It ensures that your NVR design remains resilient and adaptable. You must always plan for regular vendor-driven security patch cycles.
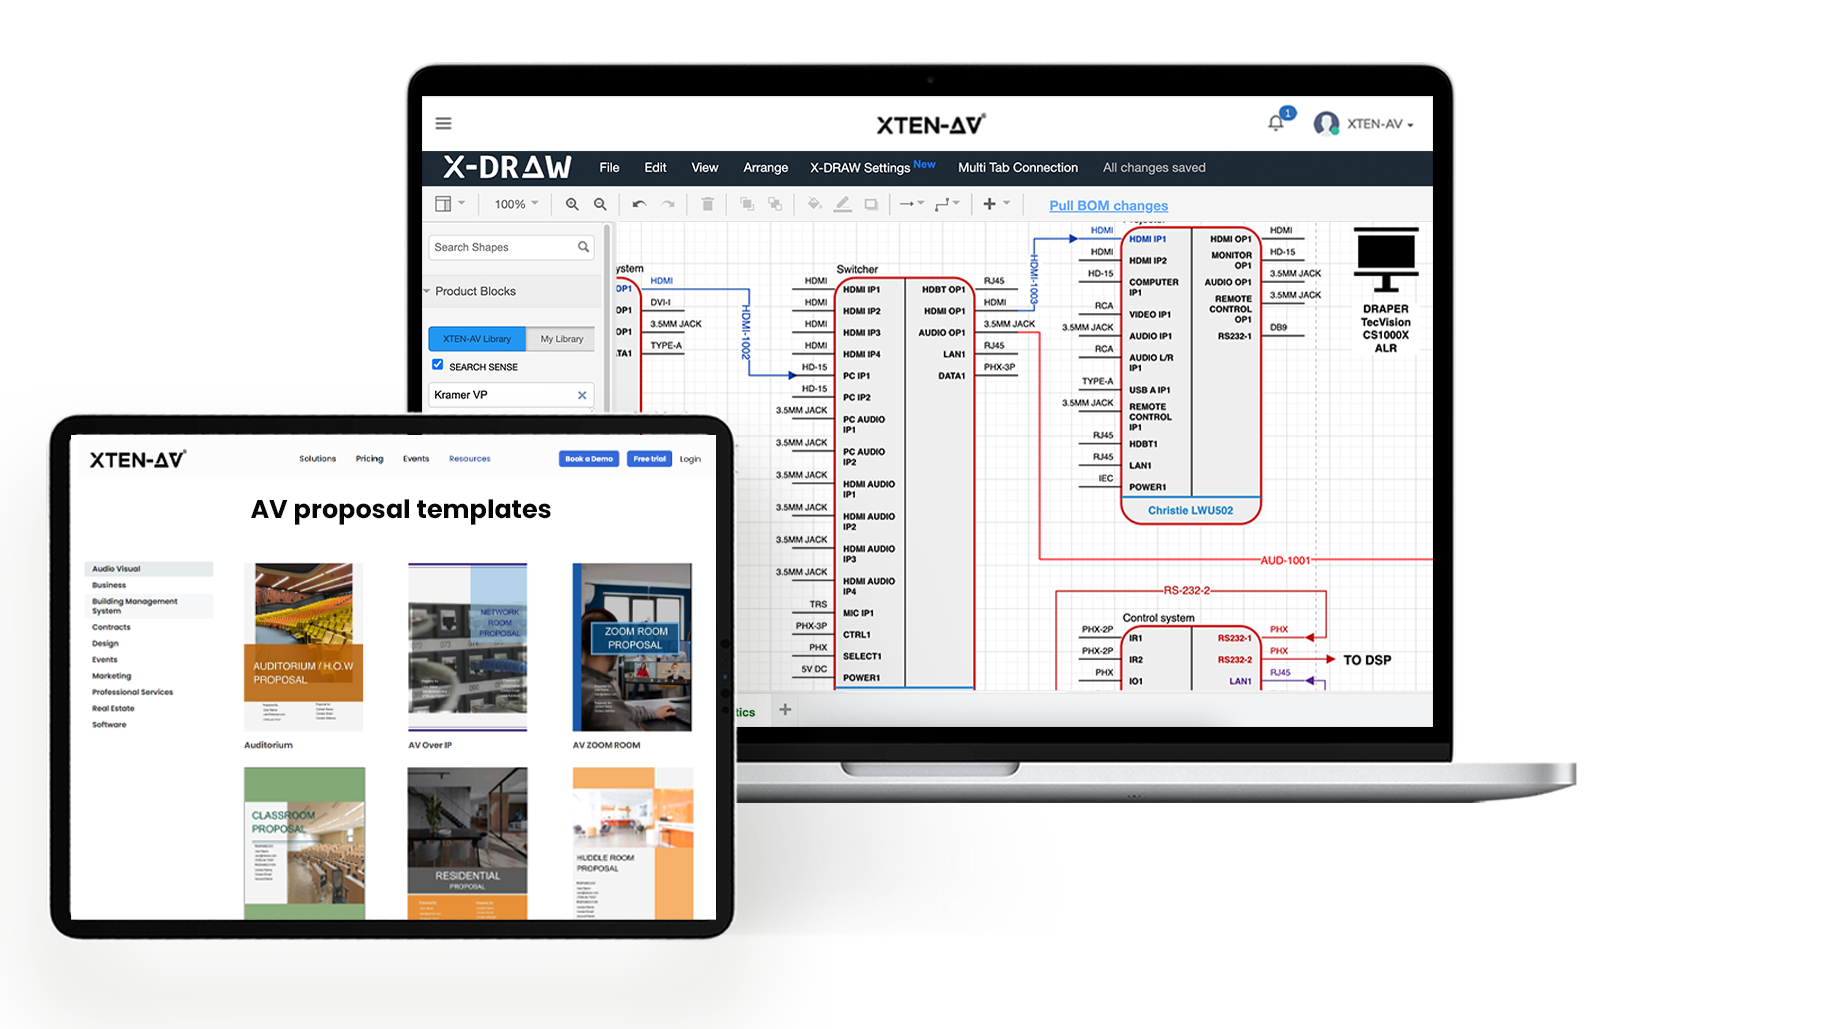
X‑DRAW automates NVR component selection and system schematic design
You can save hours and reduce errors by using XTEN-AV’s X-DRAW, an automated design tool. You’ve to begin with entering camera counts and resolution requirements. You’d also have to input the PoE budget and retention durations. Once done, X-DRAW calculates port assignments matching switch capacities and PoE budgets.
X-Draw also produces detailed cable schematics. The cable layouts show cable lengths, routing paths, and connector types in detail. It also generates rack layouts with optimal equipment positioning.
The layout also ensures airflow considerations and optimal space use. Then, X-DRAW computes the required HDD capacity. The capacity calculation is based on camera bit-rate, resolution, and retention days.
Built-in NVR design template covers channel capacities and PoE provisioning presets. The software constructs complete bills of materials listing NVRs, switches, cameras, and accessories. BOM outputs include connectors, surge protectors, and cable management components for accurate ordering.
X-DRAW integrates with an up-to-date product library reflecting current availability and accurate pricing. Intelligent validation checks prevent port or power budget overages before finalizing designs. Auto HDD sizing supports RAID and hot-swap configurations for high-availability systems.
You can also export schematics in AutoCAD, Visio, or PDF formats for stakeholder reviews. Cable labeling and QR code generation simplify field installations and future maintenance tasks. The tool also comprises version history, which logs every design iteration. As a result, engineers and designers can audit and ensure quality control compliance.
X-Draw also comprises the NVR security system design templates. These boost the project kick-off by providing proven layouts for various channel counts. Library updates ensure new camera models, NVRs, and accessories appear in your designs.
Using X-DRAW audio visual system design software, you can shorten design cycles, driving up productivity and lowering the manual effort. Your team focuses on strategic planning while X-DRAW handles detailed schematic creation.
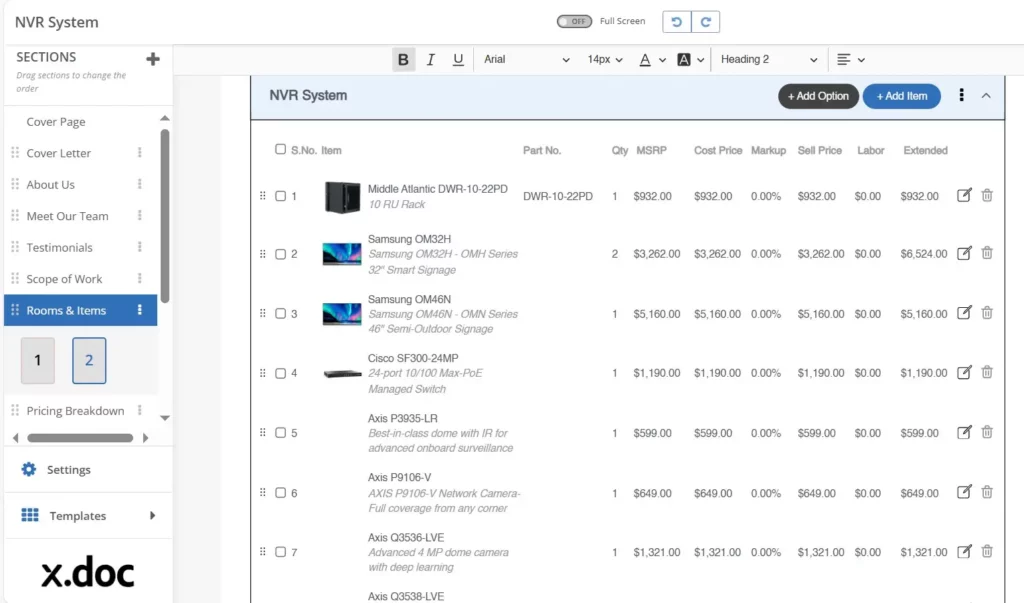
X.DOC generates NVR Security System Proposals/Procurement from your BOM and schematic instantly
x.doc helps you transform design outputs into professional proposals effectively. It imports your X-DRAW BOM and schematic data without manual re-entry. In return, it provides you with an editable proposal document. This document features clear equipment breakdowns and scope descriptions.
x.doc also formats tiered HDD pricing, optional UPS addons, and remote access services. It integrates live vendor pricing feeds to guarantee quote accuracy and profitability control. You can apply branded proposal templates tailored for NVR systems. As a result, you can ensure consistency with corporate identity.
XTEN-AV’s x.doc also comprises the digital signature fields. These fields simplify client approvals by capturing authorizations within the proposal documents. It includes revision tracking, which records every change to proposals.
x.doc also maintains comprehensive audit trails. Moreover, it helps in reducing the change orders. It does so by aligning quoted deliverables with designed schematics.
For faster document creation workflows, you can access the pre-existing NVR proposal template. Proposals include detailed labor rates, installation task breakdowns, and optional support packages. Addendum sections cover terms, conditions, and service level agreements using clear, professional language.
x.doc supports multi-language proposals to serve global clients with localized content requirements. The role-based editing permissions of the tool ensure that only authorized team members can change proposal content.
x.doc interlinks with X-DRAW designs. Thus, BOM changes are reflected immediately within the proposal content. Hence, you can revise proposals immediately when client requirements shift—the entire process streamlines negotiation and approval cycles.
You can export the final proposals to PDF or Microsoft Word formats. In this way, x.doc ensures it accommodates diverse client system preferences. The tool logs each issued proposal version. In this way, it prevents version control errors and simplifies project audits.
To sum up, x.doc enhances client trust by delivering transparent, accurate, and professional proposals every time.
X‑PRO streamlines NVR Security System installation project management and client handoff
You can manage audio visual installation workflows effortlessly with XTEN-AV’s X-PRO project management platform. If the client approves your proposal, then X-PRO auto-generates installer tasks. The tasks include port configuration, switch layout, camera positioning, and more.
Mobile-accessible floor plans display port-by-port labels and detailed installation guidance for field technicians. On-site security technicians can access the same approved design via the mobile app.
Additionally, any BOM updates synchronize across tasks, schedules, and invoices without manual intervention. X-PRO also includes customizable testing checklists to verify camera angles. It also comprises motion detection and recording functionality.
X-PRO uses Chatter, a team messaging feature. The feature facilitates real-time communication between installers, designers, and project managers.
Additionally, the tool includes ROI tracking dashboards. You can use the dashboard to track and determine installation time, cost variance, and client satisfaction metrics.
You can also use X-PRO capture client sign-off digitally within the app. In this way, you can complete installations and close project phases smoothly. The platform integrates with invoicing workflows. With this integration, billing aligns with completed deliverables immediately.
Moreover, X-Pro also allows you to assign technicians to tasks. You can use intuitive calendar interfaces and task boards for the same. This function will enable you to manage deadlines effortlessly.
Besides, X-PRO interlinks with X-DOC proposals. The interlinking ensures consistency between the quoted scope and the installed deliverables. Real-time status dashboards provide visibility into project milestones and installation progress.
Furthermore, the app features an audit log. These logs capture every action for compliance and quality control purposes. With such extensive features, X-PRO ensures efficient and scalable NVR security system installations.
When is a hybrid cloud/NVR Security System Design & Installation the smart route for clients?
Hybrid cloud/NVR is a wise choice when you need remote access, long archives, or reliable backups. You must keep recent footage on the local NVR for fast playback and daily use.
But you can push essential clips or archives to cloud storage. It will help you avoid redundancy and achieve long-term retention. XTEN-AV’s design lets you automate tiering and archival tasks. In this way, it eliminates any extra manual work.
You can centralize critical footage in the cloud for multi-site installations or regulated clients. Doing so makes audits and reviews much easier. You can over-provision local drives for normal retention. Also, you can use the cloud as an overflow during spikes or legal holds.
Moreover, you must schedule replication windows. It will help you avoid peak network times and control bandwidth costs. You must always encrypt transfers and apply strict access controls. Also, you must test retrieval times before you commit to a provider.
Finally, you should write a clear retention and legal-hold policy for your client. It will help everyone understand retention periods, retrieval steps, and responsibilities. This keeps archives searchable, compliant, and ready when you need them.
The all-in-one solution for your AV needs
Transform your audio-visual experience with XTEN-AV.
No Credit Card required
AV Design Mastery + Winning Proposals = 10x Productivity!
- ✔ Automatic Cable Labeling & Styling
- ✔100+ Free Proposal Templates
- ✔ Upload & Create Floor Plans
- ✔1.5M Products from 5200 Brands
- ✔ AI-powered ‘Search Sense'
- ✔Legally Binding Digital Signatures
Conclusion
You should start by defining precise project requirements for every NVR deployment. Then you must balance channel counts, PoE budgets, storage, and retention needs against analytics goals.
Once done, you must verify camera compatibility, ONVIF profiles, and firmware versions before finalizing specifications thoroughly. Design for scalability with modular NVRs, extra bays, and codec headroom planned.
Adopt hybrid cloud strategies when clients require remote access or long archival retention. Moreover, you must document retention policies, test procedures, and SLAs clearly to ensure operational reliability consistently.
You should use XTEN-AV tools like X-DRAW, X-DOC, and X-PRO to automate designs, proposals, and installations seamlessly.
So, what are you waiting for? Register for a free fifteen-day trial or book a free demo with XTEN-AV for more hands-on experience with the NVR security system installation.
FAQ's
Commercial NVRs vary by class: entry models often support 8–16 channels, mid-tier units support 32–64 channels, and enterprise systems can handle 128–256 or more cameras. Channel limits depend on device model, licensing, CPU/GPU resources, and network throughput. Choose an NVR with spare channels to accommodate future camera additions and analytics workloads without forced upgrades.
Size storage using number of cameras × hours per day × retention days × average bitrate per camera, then convert bits to terabytes. Factor codec efficiency, frame rate, scene motion, and compression overhead into your bitrate estimate. Add around twenty percent headroom for growth and spikes, and include RAID, parity, or cloud-archive overhead when calculating usable capacity.
Yes, the platform flags PoE budget shortfalls by summing camera power requirements and comparing totals to switch port budgets. It highlights ports exceeding IEEE 802.3af/at limits, suggests higher-capacity switches, and recommends port reassignments or cascaded solutions. You receive warnings, proposed fixes, and BOM updates to prevent power-related failures on site.
XTEN-AV maintains regular product library and template updates to reflect new cameras, NVR models, and firmware compatibility notes. Updates follow vendor releases and market availability to keep BOMs accurate and reduce integration risk. Check the platform change log and automatic library sync settings to confirm update cadence and review compatibility notes before finalizing designs.
Update NVR firmware regularly according to vendor advisories and your change control policy. Apply security patches promptly, schedule feature updates during maintenance windows, and test major releases in a lab before site deployment. Maintain firmware version logs, rollback procedures, and approvals to reduce service disruption and ensure compatibility with cameras and analytics.
Choose RAID for redundancy, data integrity, and continuous recording during drive failures; RAID 5 or RAID 6 balance capacity and fault tolerance for many NVRs. Use hot-swap bays for quick replacements and reduced downtime. Multiple independent drives may lower complexity but increase operational risk and management overhead, so weigh rebuild times and write performance carefully.
Yes, mixing brands is feasible when cameras support standard protocols like ONVIF and when integrations are tested. Confirm ONVIF profiles, firmware compatibility, and feature parity for PTZ, audio, and metadata. Validate mixed-brand deployments in a lab or pilot to uncover interoperability issues, and maintain an approved device list with specific firmware versions to simplify maintenance.
Explore more by topic
AV Design Mastery + Winning Proposals = 10x Productivity!
- Automatic Cable Labeling & Styling
- 100+ Free Proposal Templates
- Upload & Create Floor Plans
- 1.5M Products from 5200 Brands
- AI-powered ‘Search Sense'
- Legally Binding Digital Signatures
No Credit Card Required
Related Blogs
-
- Posted by Sahil Dhingra
Audio Visual Projector Screen vs Wall: Which Is Better for Image Quality...

-
- Posted by Sahil Dhingra
Audio Visual Office Ceiling Speaker System Layout Sahil Dhingra Published 08 June...
-
- Posted by Sahil Dhingra
Audio Visual 70V Ceiling Speaker Layout for Commercial AV Sahil Dhingra Published...