


Ceiling-Mounted Projector Placement Guide for AV Rooms

Sahil Dhingra
Published 12 June 2026

In AV room deployments, ceiling projection issues often surface when placement decisions are made without structured validation during design coordination and onsite execution planning. This gap between intended system design and actual room conditions leads to misalignment, rework, commissioning delays and inconsistent image output at final handover.
Ceiling-mounted projector placement depends on throw distance, screen size, screen height, ceiling height, lens offset and mounting position. AV professionals should calculate the projector-to-screen distance first, then confirm mounting height, lens alignment and cable routing before installation.
Most challenges originate from weak alignment between AV system design, procurement planning and installation execution. When spatial parameters are validated late in the workflow, it disrupts coordination, impacts cost accuracy and delays project delivery.
Key Takeaways
- Proper ceiling-mounted projector placement requires early validation of throw distance, screen dimensions, ceiling height, lens offset, and mounting coordinates before installation begins.
- A projector with a 1.5:1 throws ratio and an 8 ft screen typically requires nearly 12 ft of projector-to-screen distance to maintain accurate screen coverage.
- In enterprise AV rooms, even a 2–3-inch mounting variation can create edge cutoff, overspill, and visible screen alignment issues during commissioning.
- Ceiling height directly affects mount drop selection, lens positioning, maintenance clearance, and cable routing feasibility across commercial AV deployments.
- Short-throw projector installations require tighter placement accuracy because small shifts in distance can noticeably affect screen fit and image positioning.
- Optical lens shift maintains image alignment without reducing clarity, while excessive keystone correction can introduce scaling distortion and reduced sharpness.
- Many onsite delays originate when throw calculations, ceiling structure validation, power locations, and wiring pathways are reviewed too late in the installation workflow.
- AV integrators should confirm mounting coordinates, service accessibility, signal routing, and structural support before hardware deployment starts.
- XTEN-AV enables AV professionals to calculate projection distance, validate screen sizing, configure mounting layouts, and coordinate projector installation planning before onsite execution.
The all-in-one solution for your Audio Visual (AV) Project Design & Documentation needs
Transform your audio-visual experience with XTEN-AV.
No Credit Card required
Where Should a Projector Ceiling Mount Be Placed?
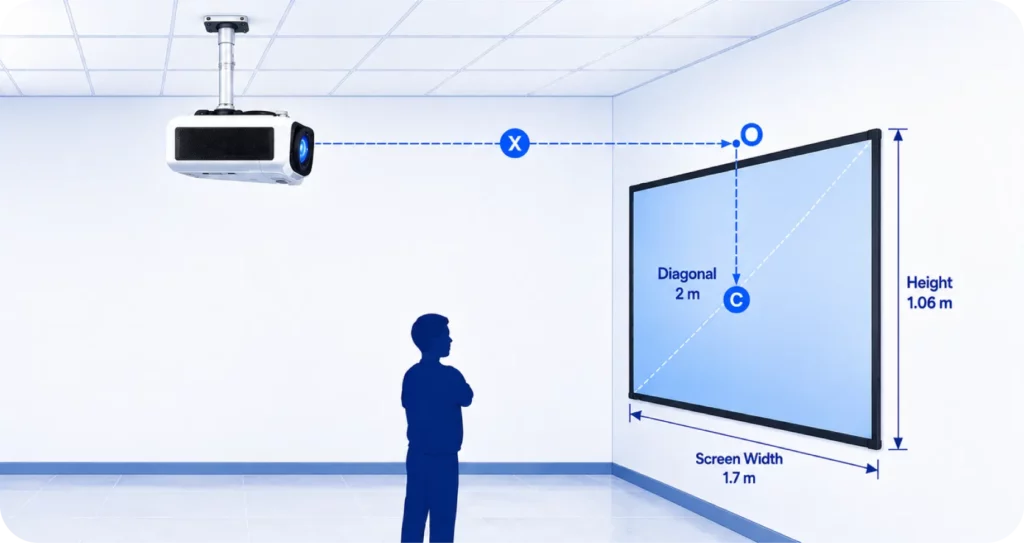
A projector ceiling mount must be placed at a distance determined by the projector’s throw ratio and screen width. The lens should be properly aligned with the screen position based on the projector’s lens offset, lens-shifting range and mounting height.
Throw Distance =Throw Ratio x Screen Width
1. Calculate Throw Distance Before Installation
AV integrators calculate projection distance before finalizing the mounting location.
Real-World AV Deployment Scenario
In conference room deployments, installers validate room depth, screen width, and lens specifications before ceiling installation begins.
Failure Case
Improper distance positioning creates oversized visuals and uneven screen coverage.
Outcome
Accurate calculations improve projection geometry and image alignment.
Throw distance calculations also depend on the projector throw ratio, which determines how far the lens should sit from the screen surface.
Before finalizing your projector placement, understand how the projector throw ratio affects screen size, image quality and installation distance.
2. Align the Lens with the Screen Centreline
The lens should remain closely aligned with the screen centre line unless optical lens shift is available.
Real-World AV Deployment Scenario
In boardrooms and classrooms, AV installers first mark the screen center, then align the projector lens axis while marking the ceiling to maintain proper image alignment.
Failure Case
Off-axis positioning increases keystone dependency and reduces edge focus consistency.
Outcome
Proper alignment improves sharpness and reduces the need for digital image correction.
3. Validate Ceiling Height and Drop Length
Ceiling elevation affects mounting height, drop length and vertical image placement.
Real-World AV Deployment Scenario
AV consultants often use adjustable hardware in high-ceiling training spaces to maintain accurate image positioning.
Failure Case
An incorrect elevation pushes the image beyond the projection surface, creating calibration issues.
Outcome
Proper placement improves viewing angles and installation accuracy.
4. Plan Cable Routing Before Mounting
Professional AV installations coordinate cable pathways and signal extension routes before hardware installation begins.
Real-World AV Deployment Scenario
In meeting rooms and training spaces, installers map HDMI/fiber routes and confirm conduit entry points before ceiling mount installation. This ensures clean routing to the AV rack or display system.
Failure Case
Poor routing creates exposed wiring, signal limitations and difficult maintenance access.
Outcome
Structured cable management improves serviceability and long-term system maintenance.
How Do You Calculate Ceiling Projector Distance from the Screen?
For calculating the ceiling projector distance, multiply the screen width by the projector’s throw ratio. Then, verify whether the calculated distance aligns with the room depth and the ceiling-mounted area.
Throw Distance = Throw Ratio x Screen Width
Distance Calculation Example
|
Screen Width |
Throw Ratio |
Projection Distance |
|
8 ft |
1.5:1 |
12 ft |
Why Distance Validation Matters
In commercial AV spaces, installers also check for ceiling obstructions, lighting grids and cable pathways before finalizing projector placement.
Common AV Installation Issue
A projector may calculate correctly during design but still require repositioning after HVAC ducts or ceiling infrastructure reduce the usable mounting area.
Result of Proper Planning
Accurate placement enhances:
- screen coverage
- image alignment
- focus consistency
- calibration stability
Not sure which projector will work for your room? Use our projector calculator to find the right setup based on your screen size and installation requirements.
How high should a projector be mounted from the ceiling?
A project should be mounted at a height that perfectly aligns with the screen. The correct height depends entirely on the ceiling height, screen position, lens offset, mount drop and lens-shifting capabilities. These are the critical factors that determine the final mount location.
The correct mounting height depends on:
- ceiling height in the room
- screen mounting position
- lens offset behavior
- drop length from the ceiling plate
- vertical lens shift capability
These factors determine how high to mount projector systems in conference rooms, classrooms and home theater environments.
Ceiling Mounting Reference by Room Condition:
|
Room Condition |
Mounting Consideration |
|
Low ceiling (under 9 ft) |
Compact flush/low-profile mount; verify head clearance |
|
High ceiling (12 ft+) |
Adjustable drop-stem mount; calculate drop length precisely |
|
No lens shifts available |
The mount position must align exactly with the screen center |
|
Lens shift available |
More vertical flexibility; still calculate throw first |
|
Short-throw projector |
Precise placement is important. Even a 1–2 ft change can affect image size. |
|
Standard throw projector |
Use throw ratio × screen width to determine distance |
How to Calculate the Required Mount Drop?
Once you know the ceiling height and the required lens height, you can determine how long the drop stem needs to be:
Required Drop = Ceiling Height − Desired Lens Height
Real Life Example:
The ceiling height is 12 ft. You need the lens at 9 ft from the floor. The mount plate to the ceiling is 2 inches. Required drop stem = 12 ft − 9 ft − 0.17 ft (plate) = approximately 2.83 ft (34 inches). Always add a 2–3-inch adjustment buffer when selecting a drop mount.
Still unsure about the ideal installation distance? Learn how far a projector should be from the screen to avoid image-sizing and placement issues.
What is the lens offset in ceiling projector placement?
Lens offset is the vertical distance between the projector lens and the projected image. It affects whether the image appears higher or lower on the screen when the projector is mounted.
Why It Matters
It directly impacts projector mounting distance, as incorrect assumptions can lead to:
- Misaligned image on the screen
- Excessive keystone correction and distortion
- Incorrect ceiling mount positioning
For Example:
A 15% upward offset means the image shifts above the lens based on image height, not screen center.
Should you use lens shift or keystone correction after mounting?
Lens shift is preferable to keystone correction because it shifts the image optically without degrading image quality. Keystone correction digitally reshapes the image and can reduce sharpness if used heavily.
Learn how lens shift vs keystone correction affects image alignment, sharpness and projector calibration after mounting, especially in real-world ceiling installation scenarios.
- Optical positioning over digital correction
Image placement is managed through the projector’s internal lens system, enabling accurate ceiling alignment while preserving native resolution and stable geometry. - Sharper output with fewer compromises
Optical adjustment maintains edge clarity and avoids pixel stretching or scaling artifacts often seen in digital correction. - Keystone as a fallback layer
Digital reshaping can correct minor misalignment, but it is not suited for major adjustments due to potential loss of fine detail. - Installation workflow matters
Physical positioning and optical alignment are prioritized first, while digital correction is used only when the mechanical setup cannot fully achieve proper screen fit.
What mistakes should AV installers avoid when ceiling-mounting a projector?
The following are the most common installation errors that lead to alignment issues, poor image quality and unnecessary rework in ceiling-mounted projector setups:
- Mounting before throw distance planning:
Installing first and calculating later often results in incorrect image size and poor screen coverage.
- Ignoring screen height:
Without proper vertical reference, the projection can appear off-center even when the distance is correct.
- Overlooking lens offset:
Missing the optical shift between the lens center and the image position leads to consistent vertical misalignment.
- Incorrect placement within the projection range:
Improper spacing can restrict image size or cause it to exceed screen limits, reducing adjustment flexibility.
- Overuse of keystone correction:
Relying on digital adjustment instead of physical alignment reduces clarity and introduces distortion.
- No cable routing plan:
Poor planning results in exposed wiring, weak slack management, and reinstallation effort.
- Skipping ceiling structure check:
Non-structural mounting compromises stability and long-term safety.
- No maintenance access consideration:
Poor positioning can block service points, making routine upkeep difficult and time-consuming.
Planning a residential setup? Explore our guide to home theater projector placement for practical tips on screen distance, viewing angles and room layout.
How does XTEN-AV help with Ceiling Mounted Projector Placement?
XTEN-AV supports projector placement by structuring early-stage AV design around measurable parameters such as throw distance, screen size, brightness levels and mounting position. This improves projection accuracy by validating geometry during planning and reducing installation-level corrections.
The following are the necessary key capabilities:
- Projector Throw Distance Calculator
XTEN-AV evaluates the feasibility of throw distance and screen compatibility using room depth, viewing distance, and layout constraints, ensuring proper image coverage within the intended display area.
- Projector Brightness Calculator
XTEN-AV determines lumen requirements based on ambient lighting conditions and application needs, ensuring projected visuals remain clear and usable in real environments.
Is your projector bright enough for the room? Use our projector brightness calculator to estimate the lumens required for a clear and comfortable viewing experience.
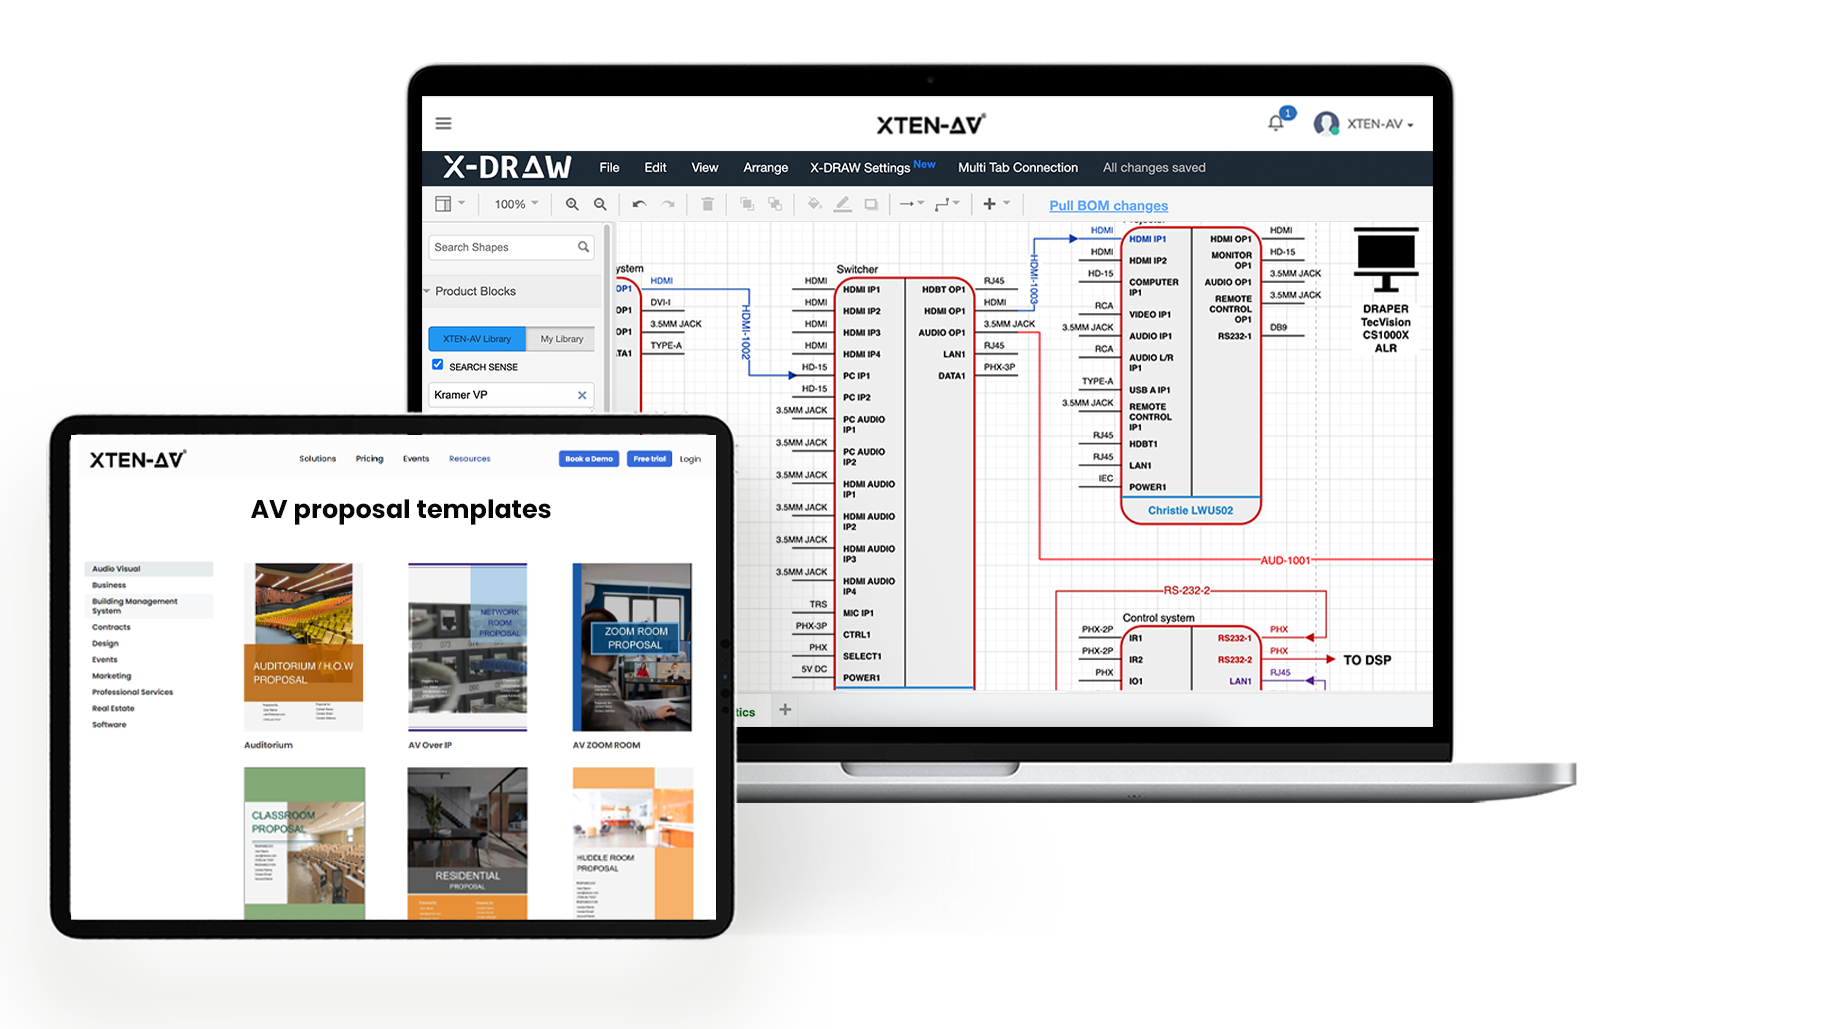
- X-DRAW by XTEN-AV
X-DRAW by XTEN-AV enables projector placement within AV room layouts and ceiling plans using a built-in 1.6M+ AV product library from 5,200+ manufacturers. This allows designs to reflect actual device specifications while validating mounting position, projection angle and screen geometry before execution.
- Projector setup diagrams
XTEN-AV converts design inputs into structured installation diagrams that define mounting height, projection alignment and screen positioning, improving field-level accuracy and reducing interpretation gaps.
- BOM and proposal workflow
XTEN-AV connects projector design outputs with automated AV BOM generation and proposal workflows, ensuring consistent equipment mapping and documentation aligned with project requirements.

The all-in-one solution for your AV needs
Transform your audio-visual experience with XTEN-AV.
No Credit Card required
Audio Visual System Design Mastery + Winning Proposals = 10x Productivity!
- ✔ Automatic Cable Labeling & Styling
- ✔100+ Free Proposal Templates
- ✔ Upload & Create Floor Plans
- ✔1.5M Products from 5200 Brands
- ✔ AI-powered ‘Search Sense'
- ✔Legally Binding Digital Signatures
Conclusion
A ceiling projector setup is most accurate when the throw distance, screen position, lens behavior and room dimensions are planned as a single centralized system. Errors usually occur when these factors are estimated separately, leading to misalignment and onsite corrections. When validated during the design stage, installation becomes more consistent and precise. Many AV professionals use structured design workflows like XTEN-AV to support planning, improve accuracy and reduce installation rework.
Want to streamline projector selection, placement and AV documentation? Discover how XTEN-AV simplifies projector integration for professional AV projects.
FAQ's
Most standard throw projectors need 10–15 ft of throw distance for a 100–120-inch screen. Short-throw projectors can produce the same image from under 5 ft.
In rooms with 8–10 ft ceilings, installers usually position the projector lens 6–12 inches above the top edge of the projection screen. Final height depends on lens offset and screen dimensions.
No, many portable projectors under 3–4 lbs are designed for tabletop use and may not support inverted airflow, threaded mounts, or permanent ceiling installation.
Yes, Professional AV installers try to keep the projector lens aligned within a few inches of the screen centerline to reduce keystone distortion and edge warping.
Lens offset defines how high or low the image appears relative to the projector lens. A projector with 100% vertical offset can position the image fully above the lens centerline.
Yes, Lens shift preserves native 1080p and 4K resolution because the adjustment happens optically. Keystone correction digitally reshapes the image and can soften fine detail.
Yes, many short-throw projectors generate a 100-inch image from only 3–5 ft away, which makes mounting precision much more critical during installation.
Commercial AV installers typically avoid HDMI runs beyond 15–20 meters. Larger installations often use HDBaseT over CAT6 cabling for signal transmission up to 100 meters.
Explore more by topic

AV Design Mastery + Winning Proposals = 10x Productivity!
- Automatic Cable Labeling & Styling
- 100+ Free Proposal Templates
- Upload & Create Floor Plans
- 1.5M Products from 5200 Brands
- AI-powered ‘Search Sense'
- Legally Binding Digital Signatures
No Credit Card Required
Related Blogs

-

- Posted by Sahil Dhingra
Audio Visual 5 Best Speaker Placement Calculators for Commercial AV Projects in...
-
- Posted by Sahil Dhingra
Audio Visual How XTEN-AV Helps Manage AV Service Calls After Installation Sahil...
-
- Posted by Sahil Dhingra
Audio Visual Field Service Metrics for AV Integrators Sahil Dhingra Published 20...