How to Calculate the Perfect Throw Distance for Any Auditorium Projector Setup

Vibhav Singh
Published 16 October 2025
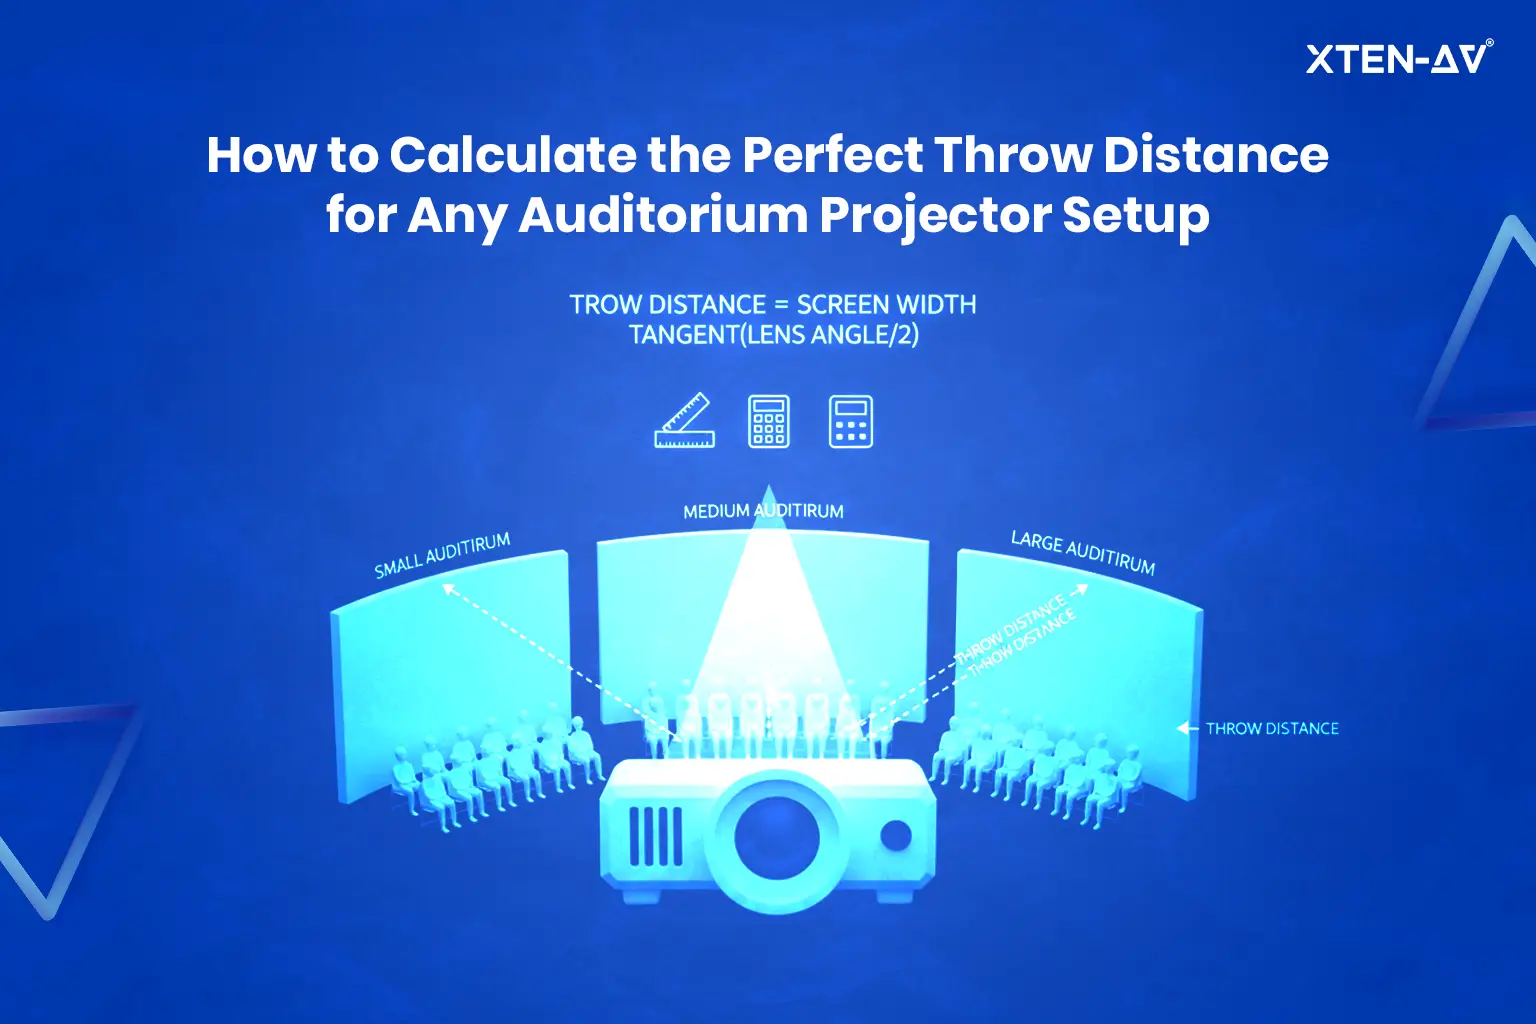

Designing a projector setup for an auditorium takes more than picking a bright model and pointing it at a wall. Spaces like lecture halls, theaters, and convention centers come with their own set of challenges. Throw distance plays a big part in determining how large and sharp the projected image appears. It also directly affects how clearly people can see the content. No matter where they’re seated.
In an auditorium projector setup, getting the throw distance right is essential. Place the projector too close, and the image might not cover the entire screen. Place it too far, and you risk dim visuals and a drop in sharpness, especially toward the back of the room.
This is where XTEN-AV’s throw distance calculator makes the difference. You just enter the throw ratio, image size and aspect ratio. The tool then shows you exactly where to place the projector. No manual math. No guesswork. With over 2,000 AV integrators already using it it’s a proven way to get fast, accurate results when precision matters most.
This blog walks you through projector throw distance calculation, what factors influence it, and how to use tools like XTEN-AV’s throw distance calculator to plan your setup within seconds.
The all-in-one solution for your AV needs
Transform your audio-visual experience with XTEN-AV.
No Credit Card required
Why Throw Distance is Critical for Auditorium Projection Design?
Auditoriums present a different set of conditions than standard meeting rooms or classrooms. For starters, they’re bigger. The screens are often 200 to 300 inches wide, the seating depth can stretch 60 to 100 feet, and the room may accommodate anywhere from 300 to over 1,000 people. These conditions make projection angles far more complex than in a typical meeting room. In tiered or raked layouts where the projector must account for vertical elevation and off-axis sightlines. Even a small miscalculation in height or angle can result in uneven brightness, distortion, or loss of clarity for those seated toward the rear or at the sides.
One of the key challenges is adjusting to how far back your audience sits. The auditorium throw distance has to be tuned so the image looks right, not just in the front row but all the way to the last seat. If it isn’t calculated properly, you may end up with blurred visuals or image distortion.
In large venue projector design, throw distance doesn’t just affect screen size. It also determines projector placement, required lens type, and image accuracy. When alignment is off, lens shift allows physical image adjustment without degrading quality, unlike keystone correction, which can distort the image if overused. Tools like XTEN-AV’s throw distance calculator, along with standard viewing angle guidelines, help ensure precision from the start.
Understanding Auditorium Projector Throw Distance Terminology
Before setting up your projector, it’s worth taking a moment to understand the core concepts. Throw distance, screen size, and lens type all influence each other. Getting these right early on can save you time and help avoid issues once you’re installing in the actual space.
What is Throw Distance in Auditorium Settings?
In simple terms, throw distance is the space between the projector lens and the screen. In an auditorium, this could be anything from 10 to 30 feet, or even more. Since these spaces often seat hundreds, the distance must be matched to the room size and screen width to avoid blurry or incomplete images.
Getting the image to fit the screen is just the starting point. In auditoriums, maintaining brightness uniformity across a wide screen is just as important, especially for large audiences seated at different angles. Features like lens shift help adjust the image without degrading quality, while minimal use of distortion correction ensures sharpness remains intact. Once those factors are accounted for, proper projection distance calculation becomes critical. It affects how clear the image looks, how sharp the focus is, and whether the brightness can hold up against ambient light.
The Importance of Throw Ratio for Large Venues
The throw ratio is what connects image width to the projector’s placement. Standard setups use ratios around 1.5:1 to 2.5:1. Short-throw options go as low as 0.4:1. For large auditoriums, long-throw lenses with ratios above 3.0:1 are often required. For example, a 2.0:1 ratio means that to project a 10-foot-wide image, the projector should sit 20 feet back. In auditoriums, projectors with long-throw lenses are commonly used because they can cover more ground without loss of quality.
Short-throw and ultra-short throw projectors aren’t ideal for large venues. They can work in some rear projection setups or with mirrored systems, but those are exceptions. In most auditorium designs, you need a lens with the right throw ratio so the image fits the screen. This becomes even more important with tiered seating, where placement and angles are harder to manage.
Key Factors That Affect Throw Distance Calculations in Auditoriums
Throw distance isn’t a fixed value. It depends on the specific details of the room such as, screen size, seating layout, ambient light, and the lens you plan to use. These elements need to align with AV industry standards to ensure consistent image quality. Understanding how these elements work together is key to designing a projection system that performs well from every seat.
Screen Size and Aspect Ratio
Most auditorium screens fall into the 16:9 or 16:10 category. Widths often start at 20 feet. The screen’s width directly affects how far back the projector needs to be. If the projector’s throw ratio doesn’t match the screen size, you could end up with images that are cut off or stretched beyond the edges.
Accurate auditorium screen size measurements help determine the minimum and maximum throw distance that will still deliver a sharp, properly sized image.
Seating Layout and Viewing Angles
Raked or sloped seating affects where the projector can be mounted. You’ll want to place it where the image isn’t blocked and doesn’t need excessive keystone correction. It also needs to align with the audience’s line of sight. Careless placement here leads to off-center visuals or parts of the screen being hard to see.
Well-thought-out projector placement ensures that everyone in the room, front, middle, or back, gets the same viewing experience.
Ambient Light Challenges
Light levels in an auditorium are often hard to control. You might have natural light from windows or bright stage lighting that washes out the screen. In these conditions, the projector’s brightness (lumens) becomes just as important as the resolution.
To get the best results, you’ll need to consider lumens vs lux, understand the room’s light behavior, and possibly use a projector brightness calculator. That way, you can match the brightness level to the venue, not just the model’s spec sheet.
Lens Type and Performance
Not all projectors come with the same lens. In larger spaces, long-throw lenses are usually required to cover the distance. They’re reliable and offer greater flexibility for ceiling or booth-mounted setups.
Short-throw lenses, while popular in smaller rooms, aren’t ideal in most auditoriums unless space is severely limited. If your budget allows for it, look for models with interchangeable lenses so you can adapt based on each room’s layout and size. Choosing the right lens helps strike a balance between performance and cost in auditorium projector installation.
Manual Method: How Throw Distance Has Traditionally Been Calculated in Auditoriums
Before automated tools became the norm, figuring out projector throw distance in an auditorium meant doing the math by hand. Installers would start by measuring the room, length, width, ceiling height, and how far the screen wall was from the last row. These details helped narrow down where the projector could actually go.
Then came the screen. Its size depended on how many people were in the room and how far back they sat. Most auditoriums use a 16:9 or 16:10 aspect ratio. Once the screen width was known, you’d match it to the projector’s throw ratio. That number, taken from the spec sheet, tells you how far back the projector needs to be to fill the screen properly.
Let’s say your screen is 22 feet wide, and your projector has a throw ratio of 1.5 to 2.5. That puts your projector somewhere between 33 and 55 feet from the screen, in theory. In real life, you’d still have to deal with light rigs, catwalks, HVAC, or balcony overhangs.
Now take a 500-seat auditorium with a 300-inch screen, about 21.5 feet wide. With a 1.8 to 2.6 throw ratio of your projector, you’d be aiming to place the AV projector somewhere between 38.7 and 55.9 feet. No shortcuts. Just measurements, calculations, and patience.
How Tools Like XTEN-AV’s Throw Distance Calculator Help Auditorium Designs?
XTEN-AV’s throw distance calculator simplifies projector planning in large spaces like auditoriums. Instead of doing manual math, you can follow a few guided steps and get accurate results tailored to your room.
Step 1: Enter the Throw Ratio
The throw ratio is the relationship between the projector’s distance from the screen and the width of the projected image. For example, a throw ratio of 1.5:1 means the projector must be placed 15 feet away to create a 10-foot-wide image. As an audio visual system installer, you’d have to often work with long-throw ratios, but the calculator also handles short-throw and ultra-short-throw configurations.
Step 2: Choose the Aspect Ratio
Aspect ratio describes the shape of the image. A 16:9 ratio is standard for video content, while 16:10 is often used for presentations. Choosing the correct aspect ratio ensures the image fits your screen without black bars or stretching.
Step 3: Enter the Image Size
You can input screen size by diagonal length, width, or height in inches. The calculator adjusts to your input format and calculates based on your preferred measurement.
Step 4: View the Placement Distances
Once your data is entered, the calculator provides minimum and maximum distances for projector placement. This ensures the image fills the screen without distortion, cropping, or brightness loss.
Step 5: Get Lens Recommendations
The tool suggests lens types based on your throw ratio and room dimensions. These may include:
- Standard throw lenses for typical mid-range placements
- Long-throw lenses for large auditoriums where the projector is placed far from the screen
- Zoom lenses that offer flexibility within a throw range
- Short-throw or ultra-short-throw lenses for situations with limited space or rear projection setups
Step 6: Download as a PDF
After completing the setup, you can download the results as a PDF. This document includes your inputs, throw distance range and lens suggestions, as per AVIXA standards. It’s useful for design documentation or on-site reference during installation.
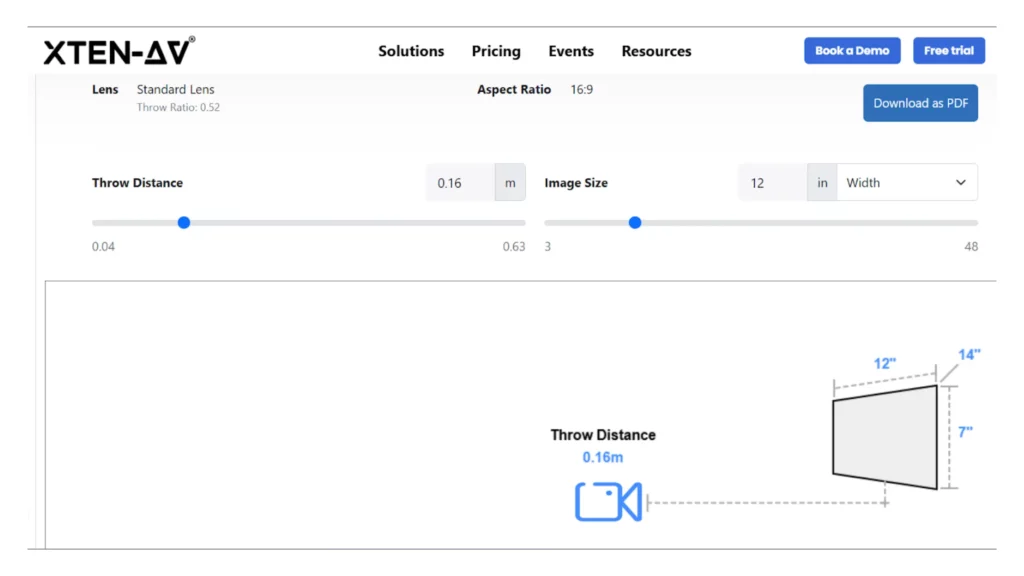
Example:
Let’s say you’re working with a 0.52 throw ratio, a 16:9 aspect ratio, and a screen width of 12 inches. Once you enter these into the XTEN-AV calculator, it returns a recommended projector placement distance of around 6.24 inches from the screen. You also get the exact image dimensions and a matching lens suggestion based on the setup. Everything is clearly laid out and ready to download and share.
The all-in-one solution for your AV needs
Transform your audio-visual experience with XTEN-AV.
No Credit Card required
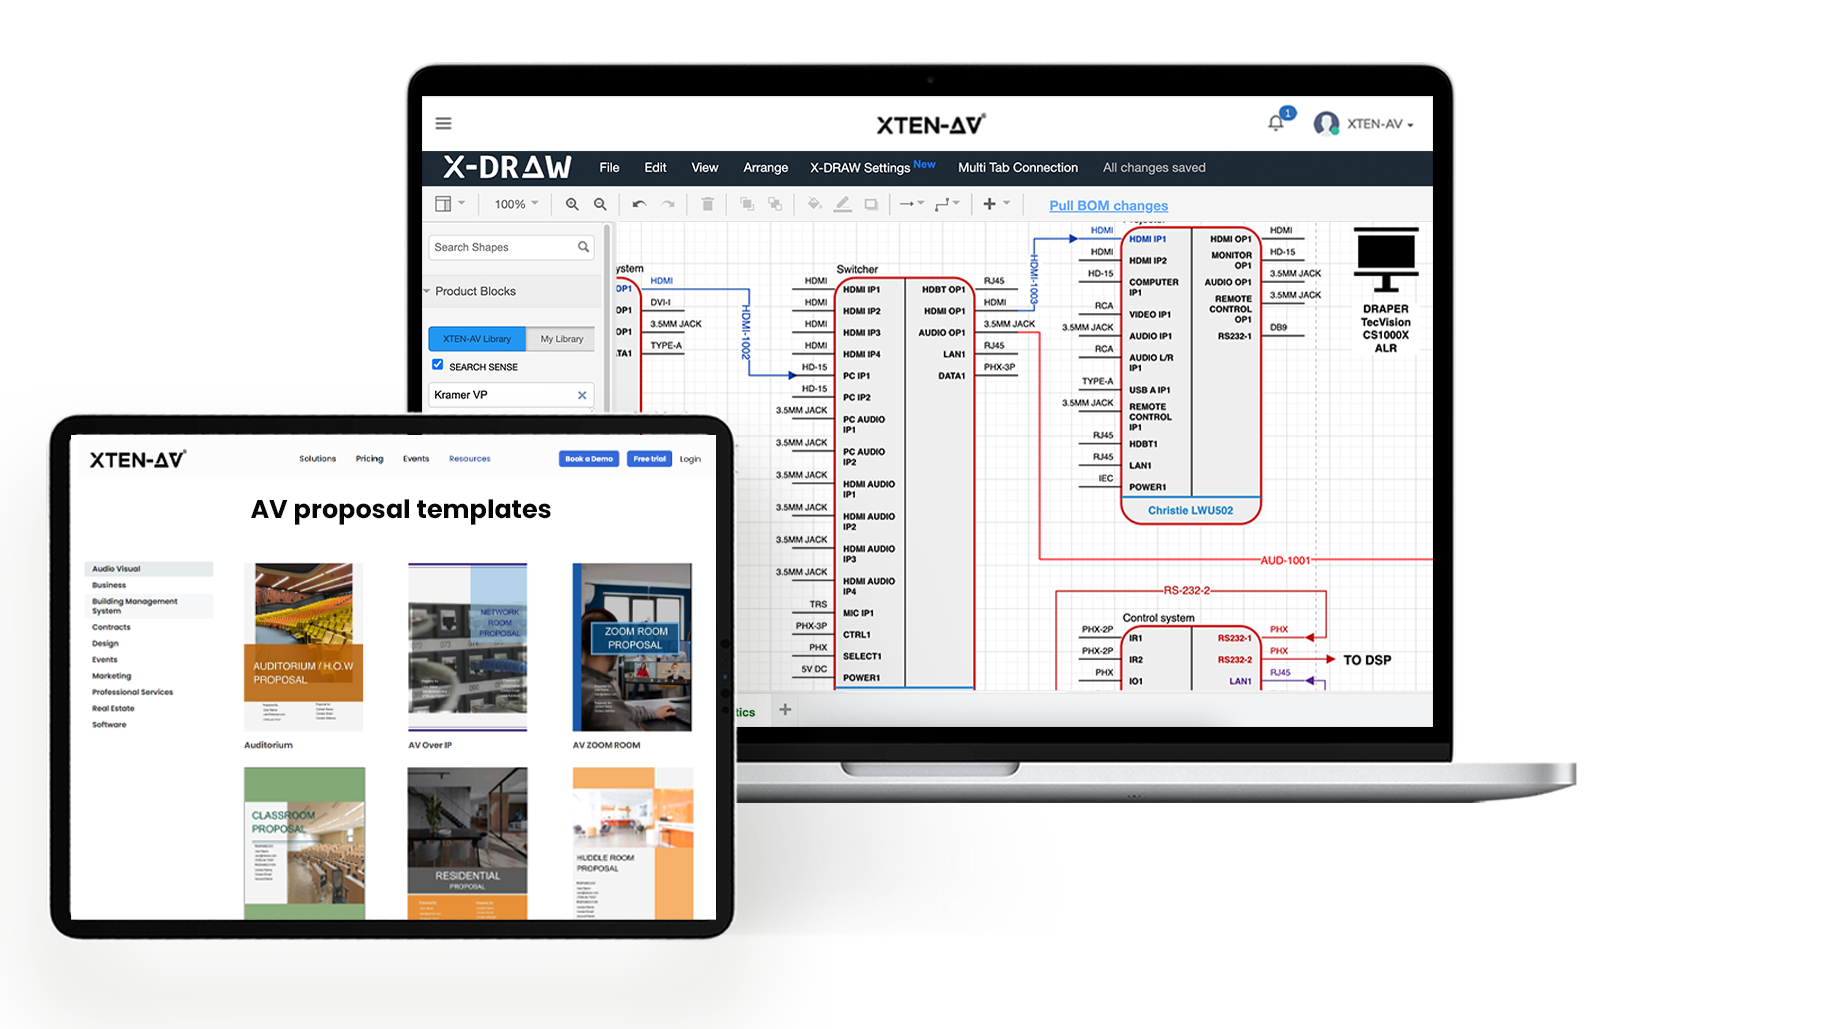
AV Design Mastery + Winning Proposals = 10x Productivity!
- ✔ Automatic Cable Labeling & Styling
- ✔100+ Free Proposal Templates
- ✔ Upload & Create Floor Plans
- ✔1.5M Products from 5200 Brands
- ✔ AI-powered ‘Search Sense'
- ✔Legally Binding Digital Signatures
Common Auditorium Projection Mistakes to Avoid
When working on an auditorium projector setup, it’s easy to miss small details that can cause big problems later. Avoiding these common mistakes helps ensure the system performs well for everyone in the room.
Using the Wrong Type of Projector
It’s easy to choose a projector that seems good on paper but falls short in a large room. Many people go with models built for home use, not realizing they lack the brightness or lens flexibility needed for bigger spaces. In rooms with more light or deeper seating, you’ll want a projector with at least 5,000 to 10,000 ANSI lumens. That kind of output helps keep the image sharp and visible from any spot. Professional models also give you options for lens adjustments and better image control, which basic projectors usually don’t offer.
Overlooking Light Conditions in the Room
Ambient light can quietly reduce image quality. Whether it’s daylight from windows or strong stage lighting, the brightness of your projector has to compensate for it. Ignoring this often leads to washed-out images, especially on larger screens. Light control or choosing a projector with adequate lumen output is essential.
Underestimating Screen Size and Viewing Angles
A common oversight is assuming any screen will do. In reality, the screen size needs to be calculated based on the room’s depth and width. Another mistake is ignoring viewing angles. Placing the screen too high, too low, or too far to one side can make it hard for people seated off-center to see the content clearly. A screen size calculator like the one built into XTEN-AV is helpful here, especially in large halls where viewers are seated at extreme angles. If the screen is too small, those in the back may struggle to see clearly.
Improper Lens Selection
Not all lenses are designed for large venues. If the wrong auditorium projector lens is chosen, the projector might need excessive keystone correction to align the image, which can lead to distortion. Understanding lens options early in the design process helps avoid adjustments that compromise quality.
Skipping a Throw Distance Check
Many installers mount the projector first, then check if the image fits. This often leads to last-minute changes. Using a projector throw distance calculator like XTEN-AV beforehand ensures accurate placement and helps avoid misalignment. Proper projectors throw distance calculation also helps in narrowing down compatible lens options.
Conclusion
In large venues like auditoriums, projector placement isn’t something to leave to chance. A few feet off, and the image might look stretched, dim, or misaligned. That can affect the entire viewing experience, especially for people seated farther back.
Getting the projector throw distance calculation right from the start helps avoid last-minute changes and keeps the installation process smooth. Instead of crunching numbers manually or testing positions on-site, there’s an easier way.
With XTEN-AV’s Throw Distance Calculator, you just plug in your screen size, aspect ratio, and projector specs. The tool handles the rest, showing you exactly where to mount the projector and what lens will give you the best results.
Simulate your auditorium projector setup today with XTEN-AV’s Throw Distance Calculator.
FAQ's
It depends on the projector’s throw ratio. A 300-inch diagonal screen is about 21.5 feet wide. If you’re using a projector with a 2.0:1 throw ratio, you’d need to place it roughly 43 feet back. That distance changes if your ratio is shorter or longer. Instead of guessing, many AV professionals use a projector throw distance calculation to get exact numbers before committing to mounting positions, especially in large venues where adjustments are harder to make later.
There’s no single best throw ratio. It really comes down to the room layout. That said, most auditorium setups work well with ratios between 1.5:1 and 3.0:1. These allow for flexibility when placing the projector farther from the screen, often in ceiling mounts or rear booths. If the room is especially deep or the screen extra wide, a higher throw ratio offers more breathing room. The choice also depends on what projector lens options are available for the model you’re using.
Shadows happen when someone walks into the light path between the projector and the screen. In auditoriums, this is common with front projection. You can reduce the problem by mounting the projector higher, placing it farther back, or using rear projection when the layout allows. Some professionals also choose a long-throw lens, which shifts the projection angle and helps avoid casting light directly across the stage. Good projector positioning early on saves a lot of frustration later.
Brightness needs vary. But for a 1,000-seat auditorium, you’re usually looking at something in the range of 8,000 to 12,000 lumens. That’s enough to cut through ambient light and stage glare while keeping the image visible from the back row. It’s not just about size. Things like the height of the ceiling, the screen gain, and even the color of the walls matter. A screen size calculator and the specs of the room help you figure out what brightness level will work best.
Explore more by topic
AV Design Mastery + Winning Proposals = 10x Productivity!
- Automatic Cable Labeling & Styling
- 100+ Free Proposal Templates
- Upload & Create Floor Plans
- 1.5M Products from 5200 Brands
- AI-powered ‘Search Sense'
- Legally Binding Digital Signatures
No Credit Card Required
Related Blogs
-

- Posted by Sahil Dhingra
Audio Visual Resource Allocation in AV Project Management: A Step-by-Step Guide Sahil...
-
- Posted by Sahil Dhingra
Audio Visual How to Create Audio Visual (AV) Schematic Diagrams 10x Faster...
-
- Posted by Sahil Dhingra
Audio Visual How AV Integrators Cut 60% of AV Design Time with...