


Sports Bar TV Layout Guide: Screen Placement, Viewing Distance & AV Zones

Sahil Dhingra
Published 15 April 2026
Most sports bars don’t lose customers because of bad food or slow service. They lose them because someone couldn’t see the screen, and by the time the owner notices, it’s already showing up in shorter dwell times, less return visits, and dead zones on game night that no special drink can fix.
A well-planned sports bar TV layout & AV setup isn’t just a design decision; it’s a revenue one. Customers who can see and hear clearly stay longer, spend more, and come back for the next match. The ones who can’t have clear visibility, leave early and don’t rebook. The difference usually comes down to the details most people overlook during the initial AV design process: screen sizing, mounting heights, viewing distances, and AV zoning.
This sports bar TV placement guide walks you through everything, whether you’re designing your first sports bar AV system or reworking one that isn’t performing as it should.
Sports Bar TV Layout: Quick Guide
- 6-12 TVs minimum, scaling with venue size
- 2.5× rule: optimal viewing distance equals 2.5× the screen’s diagonal
- 57-80 inches: screen center height, seated to standing zones
- 2-3 screens visible from every seat, without turning or craning
- 4 AV zones to plan for: bar counter, dining floor, patio, private areas
- 1 video wall + distributed displays: the setup most well-designed venues land on
Each number has a reason behind it. The sections below explain all of them.
The all-in-one solution for your Audio Visual (AV) Project Design & Documentation needs
Transform your audio-visual experience with XTEN-AV.
No Credit Card required
Key Takeaways:
- Every seat should have a clear line of sight to at least 2–3 displays.
- Follow the 2.5× rule: viewing distance ≈ 2.5× screen size.
- Mount screen centers at 57–65 inches (seated) and 72–80 inches (standing).
- Plan separate AV zones for bar, dining, patio, and private areas.
- Use video walls for shared moments, multiple displays for multi-game viewing.
- AV over IP enables flexible, scalable signal routing.
- XTEN-AV helps Audio visual (AV) integrators design, document, and propose systems faster.
Why Does TV Placement Matter in a Sports Bar?
A sports bar isn’t a living room, and bar TV layout design reflects that. You’re working with seating at multiple depths, heights, and angles: bar stools, booth benches, high-tops, floor tables, all competing with window light, neon signs, and overhead fixtures for visual attention.
A Commercial TV layout placement in the sports bar determines if customers will remain until the end of the show or request their bill during the first intermission.
The stakes are practical:
- Wrong mounting height and necks hurt within 20 minutes.
- Wrong angle of LCD or QLED panels wash out past 35 degrees.
- The room lacks sightline planning, resulting in obstructed views in 50 percent of the space.
- A west-facing window will make a 1000-nit display impossible to watch by mid-afternoon.
This is why AV integrators need to study the space before choosing a single display. Ceiling height, column placement, light sources and seating density define what’s possible. Integrators using X-DRAW start by mapping everything onto a dimensioned floor plan before anything goes on the wall.
That upfront planning catches the problem before it becomes an onsite surprise.
How to Choose the Right TV Size for Sports Bar Viewing Distance?
Picking the right screen size isn’t just about what looks good on the wall; it’s about whether someone sitting 15 feet away can actually read the score.
Screen size and viewing distance work together. Go too small in a deep dining room, and the back rows are squinting at a blur. Go too large in a tight bar area, and the front seats are staring at pixels instead of the play.
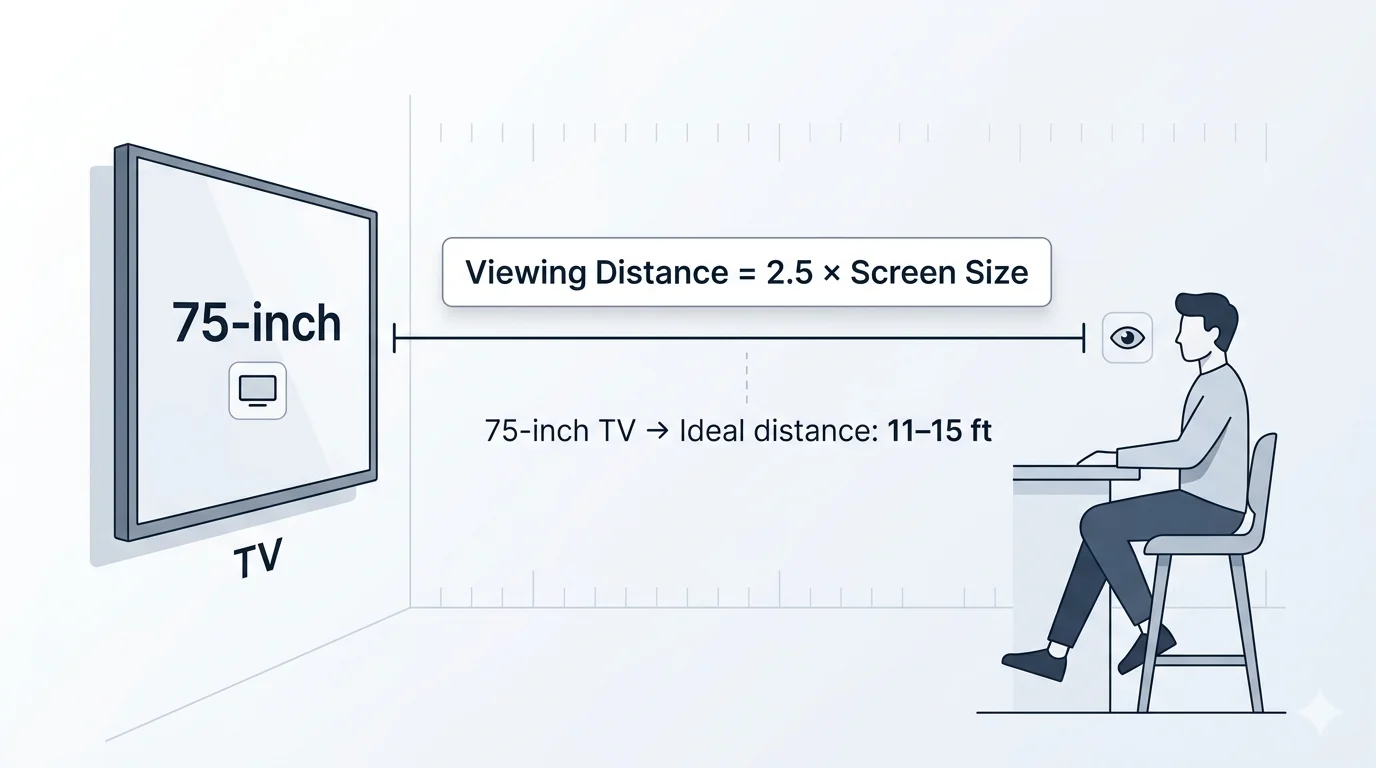
The 2.5x Rule
Sports bar TV display installations follow a standard commercial display viewing distance, requiring viewers to sit 2.5 times the screen’s diagonal distance from the seating area.
The 75-inch display requires viewers to sit between 11 and 15 feet from the screen, establishing 8 feet as the minimum comfortable viewing distance.
4K displays allow viewers to watch content from closer distances because their higher pixel density enables detailed image viewing without pixelation at those distances.
Sizing by Zone
Different areas of a sports bar have varying depth profiles, so the screen size needs to scale accordingly.
- Bar counter seating (close range, 5-8 feet): 55-65 inch displays are typical, which operators position directly above or across from the bar.
- Dining floor seating (medium range, 10-15 feet): 75-85 inch displays or larger, which require specific ceiling height and wall space measurements.
- Back-of-room / large open areas (15+ feet): Consider 85-100 inch commercial displays or video wall configurations.
- Patio or outdoor areas: require outdoor-rated commercial displays which produce higher nit output, 1,500 nits to handle ambient sunlight.
Here’s a quick reference for screen size vs. viewing distance:
Screen Size | Minimum Distance | Ideal Distance |
55-inch | 5–6 ft | 7–10 ft |
65-inch | 6–7 ft | 8–12 ft |
75-inch | 8 ft | 11–15 ft |
85-inch | 10 ft | 13–18 ft |
XTEN-AV’s free Screen Size Calculator handles this without the manual math. You enter room dimensions, orientation, display purpose, and source resolution (1080p or 4K), and it calculates the recommended display size based on AVIXA’s DISCAS standard and provides brand recommendations.
It gives separate recommendations for front and side-wall placements, which is exactly the kind of multi-wall coverage a sports bar layout requires. Thousands of AV professionals have already used it to spec displays faster and more accurately.
Want to skip the manual calculations?
Use XTEN-AV’s Screen Size Calculator to instantly determine the ideal display size based on your room dimensions and seating layout.
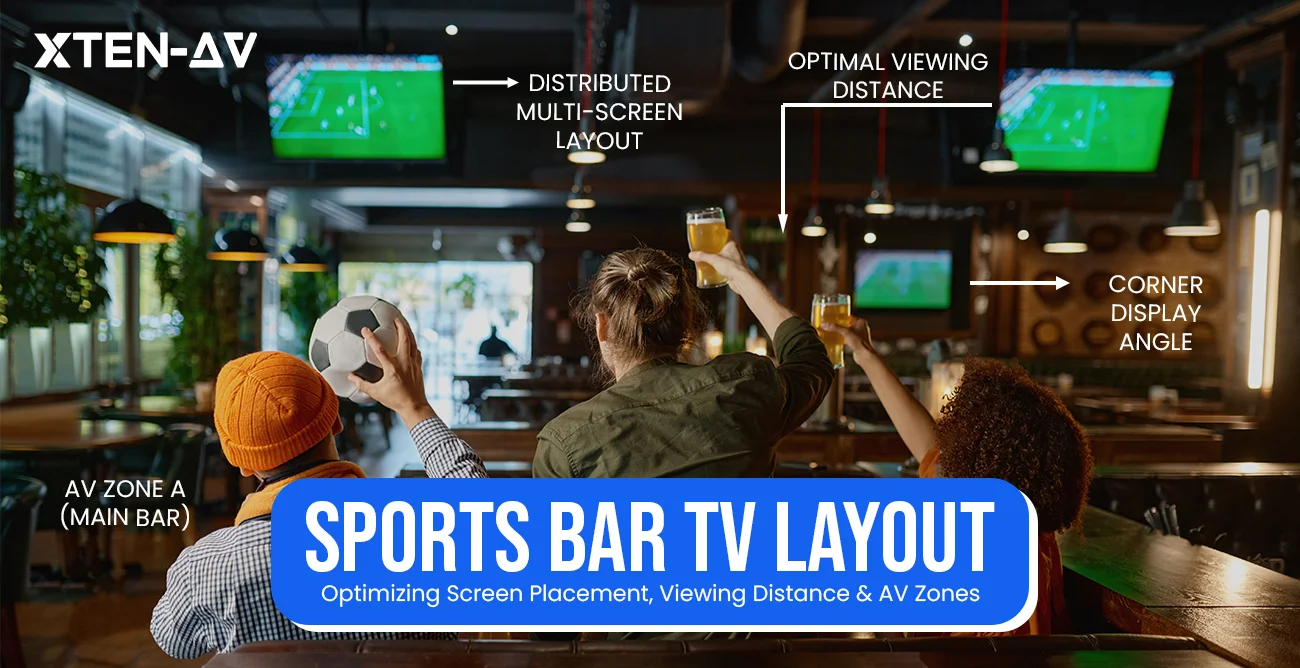
Where Should TVs Be Placed in a Sports Bar Layout?
The basic rule for placing displays in sports bars requires that all patrons have unobstructed views of two to three screens. The screen installation fails when a customer needs to move their body or extend their neck to view an installed display from their table position.
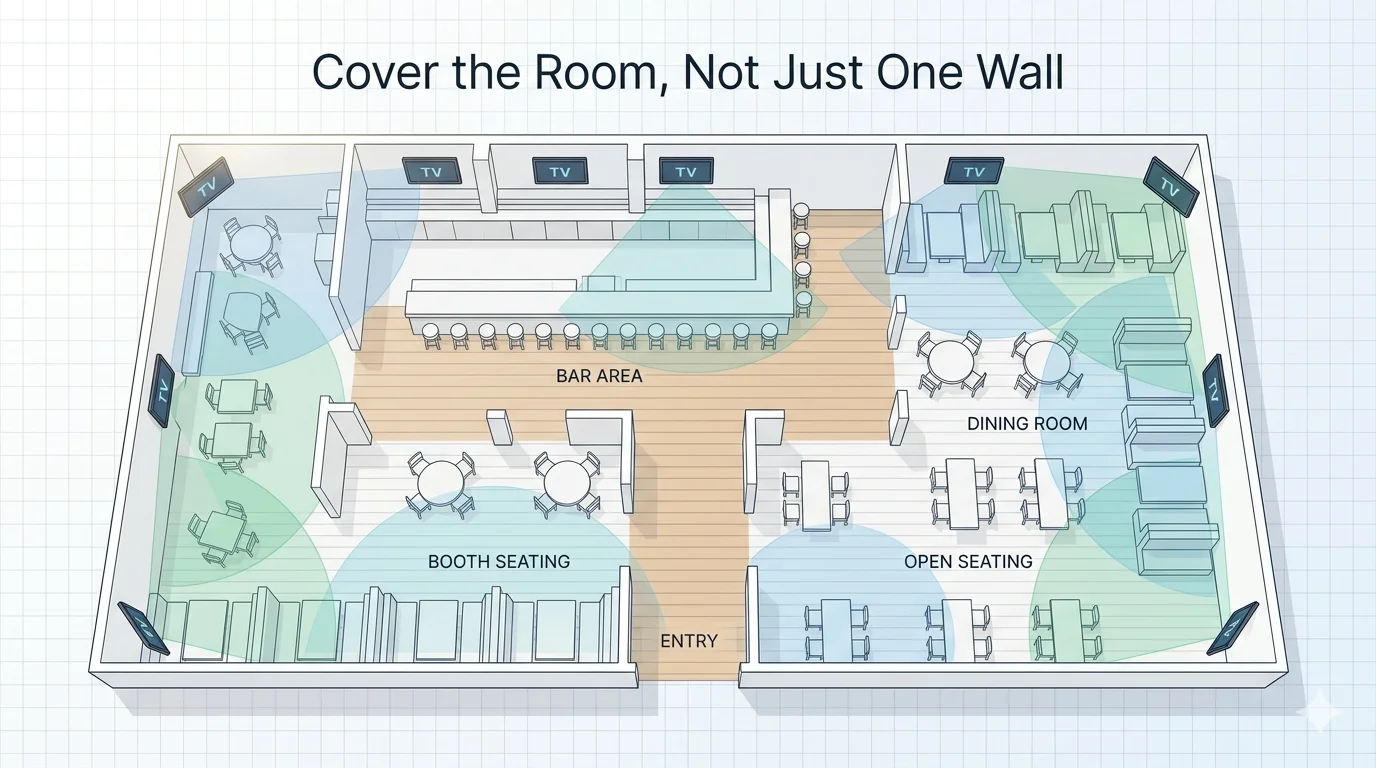
Cover the Room, Not Just One Wall
A single TV wall looks like a residential living room, not a sports bar. In a commercial venue with multiple seating areas, you need displays on multiple walls. This is especially true because flat-panel LCD and QLED displays lose image quality past about 35 degrees off-center.
A screen that’s directly in front of you looks great. That same screen viewed from a sharp side angle looks washed out and dull.
Corners are natural placement points because they’re often visible from multiple areas of the room at once.
High-traffic zones- near the bar counter, facing the entrance and above seating islands are priority locations.
Structural Clearance Rules
When planning display positions relative to seating and furniture:
Tables need at least 48 inches of vertical clear zone above them for comfortable overhead viewing.
Bar counters need 24 inches of clearance because the distance between the counter surface and the lowest point of the display must be at least 24 inches for proper function.
To preserve unobstructed sightlines, the visibility clear zone standard mandates a 36-inch separation from structural columns.
Instead of using clipboard measurements during a site survey, Audio visual (AV) design software such as X-DRAW enables users to create clearance rules by placing displays directly on the floor plan. This allows users to confirm sightlines and clearances in the actual drawing.
Indoor vs. Patio Sports Bar TV Setup
The primary distinction between indoor and outdoor restaurant TV placement areas comes from their exposure to direct sunlight. Standard indoor commercial displays, which operate at brightness levels between 500 and 700 nits, are rendered useless when exposed to direct sunlight. Outdoor displays in patio sports-bar TV setups require 1,500 nits of brightness to work correctly. The optimal display size for an outdoor sports bar patio TV should range from 65 to 75 inches to ensure viewers can see over furniture backs, umbrellas and other obstacles.
What Is the Best TV Mounting Height for a Sports Bar?
Getting commercial TV mounting height right is where most installation teams make their first error. To prevent physical contact and liquid spills while maintaining the display’s visibility throughout the space. Because viewers in higher positions will need to tilt their heads up at a 30-degree angle for extended periods, the display must be installed at a precise height.
Screen Height Guidelines by Seating Area
These bar TV height guidelines exist for a reason: position the screen center about 15 degrees above normal eye level, enough to see over heads in the room, not so high that it causes strain over a full game
Seated bar-area viewers: screen center at 57-65 inches above the floor.
Standing viewers (bar rail, high-top areas): screen center at 72-80 inches from the floor.
Mixed seating zones: Use the dominant seating type as your baseline and adjust with a tilting mount.
The 90-Inch Bottom Rule
The most widely used TV mounting height for a bar: set the bottom of the display at 90 inches above the finished floor, then tilt it 5–8 degrees forward. This works well for most bar configurations where viewers are a mix of seated and standing guests at varied distances.
The downward tilt of mounting brackets brings the image center closer to the viewer’s eye level, compensating for higher mounting positions. Swivel mounts are an effective solution for corners and angled walls because their ability to rotate provides complete coverage of seating areas, which fixed mounts cannot.
Wall Reinforcement
Before finalizing mounting positions, you must install 3/4-inch fire-treated CDX plywood behind the drywall surface on any wall that will support display mounts. The mounting brackets tilt downward, bringing the image center to the viewer’s eye level because they are mounted higher. Swivel mounts function properly in corners and on angled wall sections because their fixed positions do not cover the entire seating area.
How to Create AV Zones in a Sports Bar AV System?
AV zoning for restaurant and bar design follows the same principle: different areas serve different functions and require different audio and video treatments. The bar counter is loud and energetic. The dining area needs clear audio without killing conversation. The patio operates differently again. A private booth may want guest-selectable channels.
A proper AV system design for a sports bar starts with separating the venue into independent zones. Running everything on one feed causes constant conflicts
Defining Your AV Zones
Primary viewing zone: Main bar area and central floor seating. Large displays or video walls, loud audio and priority signal routing.
Secondary viewing zones: Side dining rooms, elevated seating, overflow spaces. Smaller screens, lower audio tuned for conversation.
Bar counter zone: Close-range displays above the bar, often with separate audio routing.
Patio zone: Outdoor-rated displays, weatherproof speakers and independent volume control.
Private booth or VIP zone: Guest-controlled channel selection, separate audio path, optional touch panel or app control.
When a client asks, “Can you show me how this will work?”
A signal flow diagram or floor plan produced in X-DRAW answers that faster than any verbal explanation. Each zone is mapped, labeled, and tied to the signal path, so the client sees exactly what gets routed where before a single cable is pulled.
Audio and Signal Infrastructure
Each visual zone needs a matched audio zone. A 70V distributed system handles large venues cost-effectively. The advanced configuration features of Dante-based networks enable improved routing capabilities and deliver improved performance with reduced latency.
Zone-level DSP control, typically handled by platforms such as Q-SYS, Biamp, or BSS, provides independent volume, EQ, and source routing per zone.
The target requires consistent audio coverage at 70-85 dB SPL throughout each zone, per AVIXA audio coverage guidelines, to prevent sound interference between areas during simultaneous games.
For signal distribution, HDMI Matrix vs AV over IP, the choice comes down to two architectures:
HDMI matrix switching: Fixed I/O, ultra-low latency, good for smaller venues with a stable source and display count.
AV over IP sports bars: any source to any display over Cat6A or fiber, scales without rewiring — the preferred choice for venues running 20+ displays.
With AV over IP and a gigabit PoE switch as the backbone, bar staff can switch any game to any screen from a tablet without remotes or technician calls.
With XTEN-AV’s X-DRAW, you can visually map AV zones, signal flow, and display placement using floor plan design software, before installation begins.

Sports Bar Video Wall vs TVs: When to Use Each?
This is one of the most common questions in sports bar AV design, and the answer depends entirely on the experience you’re trying to create.
When a Video Wall Wins
A video wall installation is nothing, but multiple commercial displays tiled into a single seamless surface that creates a shared, immersive moment.
Video walls make sense when:
You want a central anchor display that becomes the focal point of the venue.
The majority of guests are watching the same game.
You have a large open floor plan where one wall dominates multiple seating areas.
You want to run branded content, promotions, or split-screen feeds alongside live coverage.
Common configurations: 2×2 for bar feature walls, 3×3 for open-floor anchor displays, 1×3 horizontal for back walls with lower ceilings.
When Multiple Displays Win
Multiple screens win when guests are watching different things. A bar running NFL Sunday, a Premier League match, an NBA game, and a UFC undercard simultaneously needs independent display zones, not a single video wall locked to one feed.
With matrix switching or AV over IP, staff can independently route any source to any screen. That’s the practical reality of most busy sports bars on a typical weekend.
Most well-designed venues combine both: a video wall as the featured event anchor, and a distributed multi-screen layout covering the rest of the room.
Proposing either setup to a client is straightforward when the layout is already built in X-DRAW: floor plan, signal path, seating coverage, all in one view. That kind of documentation gets proposals approved faster.
Here’s a quick reference for Video Wall vs. Multiple TVs, what works best in different sports bar settings:
Factor | Video Wall | Multiple TVs |
Experience | Immersive | Flexible |
Content | Single focus | Multi-game |
Cost | Higher | Moderate |
Best Use | Big events | Daily operations |
Common Sports Bar TV Layout Mistakes to Avoid
These are the problems AV integrators see repeatedly in sports bar installs — and the ones that generate the most callbacks.
- All displays on one wall: Dead zones across the rest of the venue. Spread screens across multiple walls.
- Ignoring glare during planning: A west-facing screen becomes unwatchable every afternoon. Map light sources before finalizing placement.
- Using residential displays: Consumer TVs aren’t built for commercial hours or brightness demands. Specify commercial-grade LCD, LED, or QLED with the right nit rating.
- No independent audio zone control: One audio feed means you can’t balance a loud bar against a quieter dining section. Zone-based DSP control is non-negotiable.
- Undersizing rear displays: The 2.5x rule works both ways. If back seating is 20 feet out, a 65-inch screen won’t cut it.
- Over-relying on long HDMI runs: Signal degrades beyond 30 feet. Use AV over IP over Cat6A for anything beyond that.
- No signal distribution plan from day one: retrofitting a matrix or an AV-over-IP backbone after installation is expensive. Build it into the initial design.
How XTEN-AV Helps AV Pros Design Sports Bar TV Layouts Faster
A sports bar AV project has many moving parts: a floor plan with display positions, a signal-flow diagram, a rack layout, an equipment schedule, and a client-ready proposal with a BOM and pricing. On a typical project, producing all of that takes hours, and it usually goes through multiple revision cycles before the client signs off.
XTEN-AV is built specifically for AV integrators, and it compresses that entire workflow.
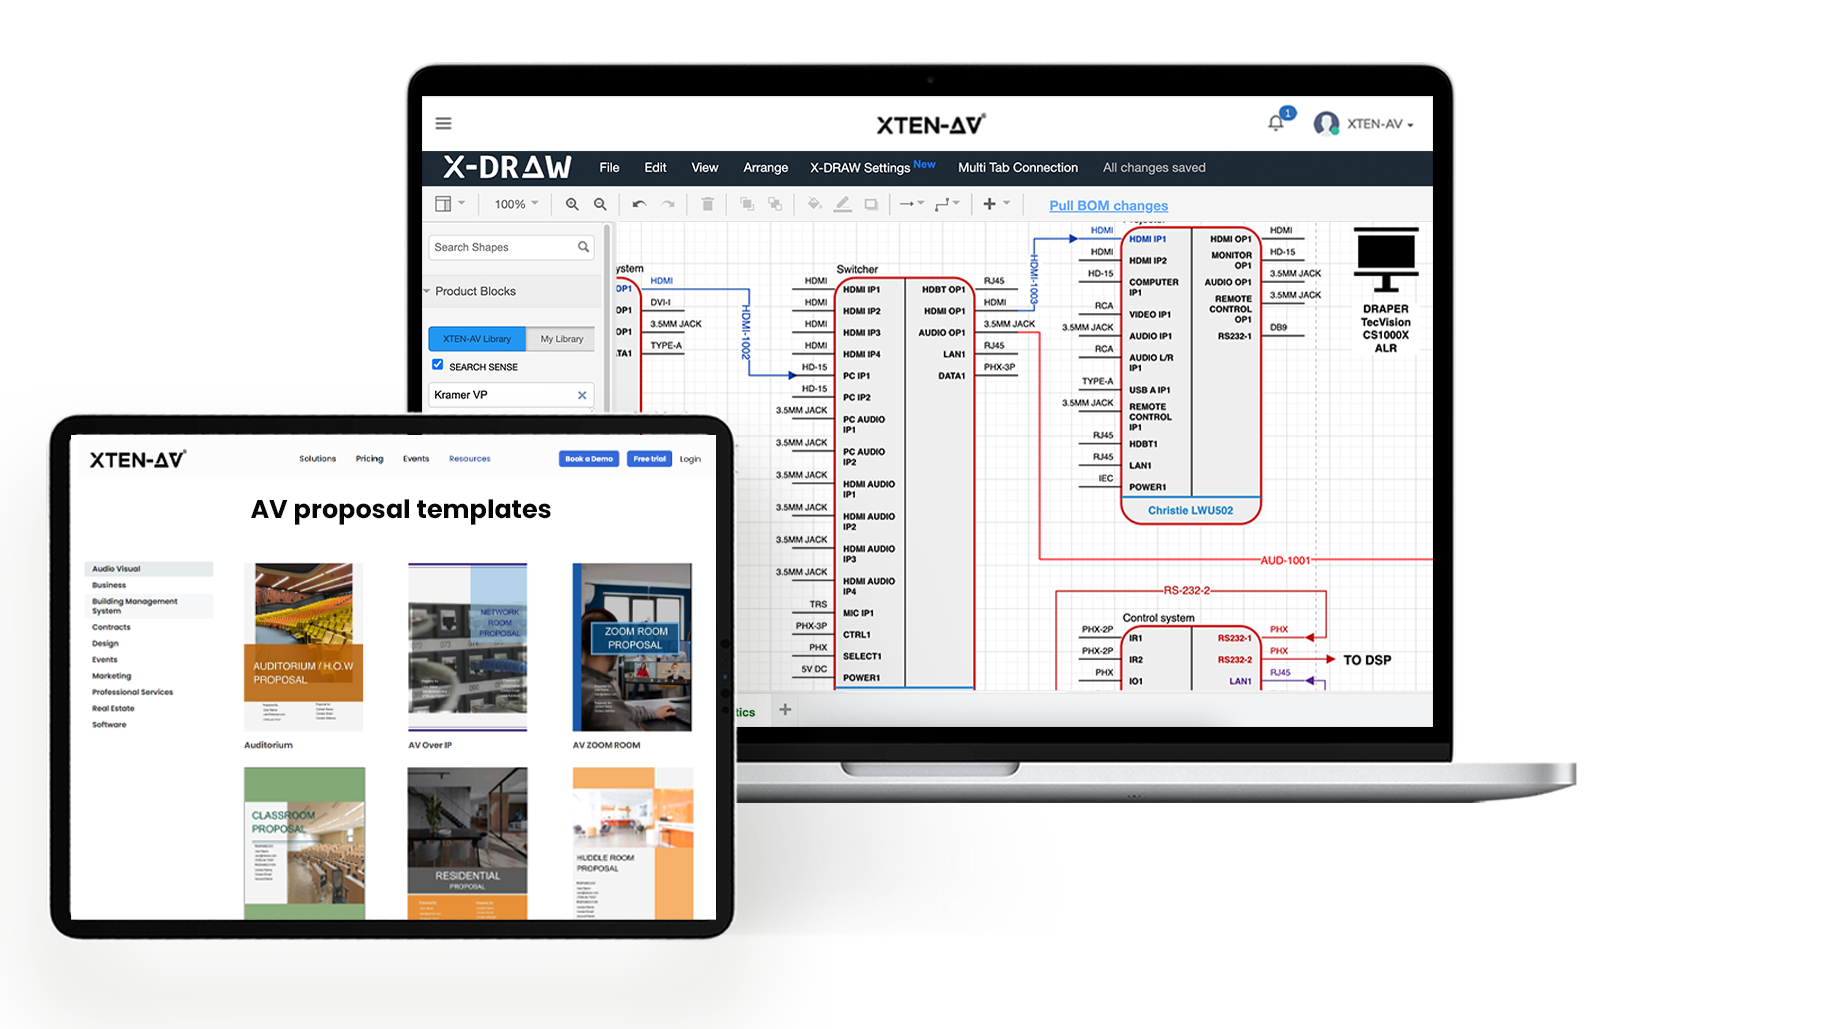
Audio visual (AV) Design and Documentation with X-DRAW
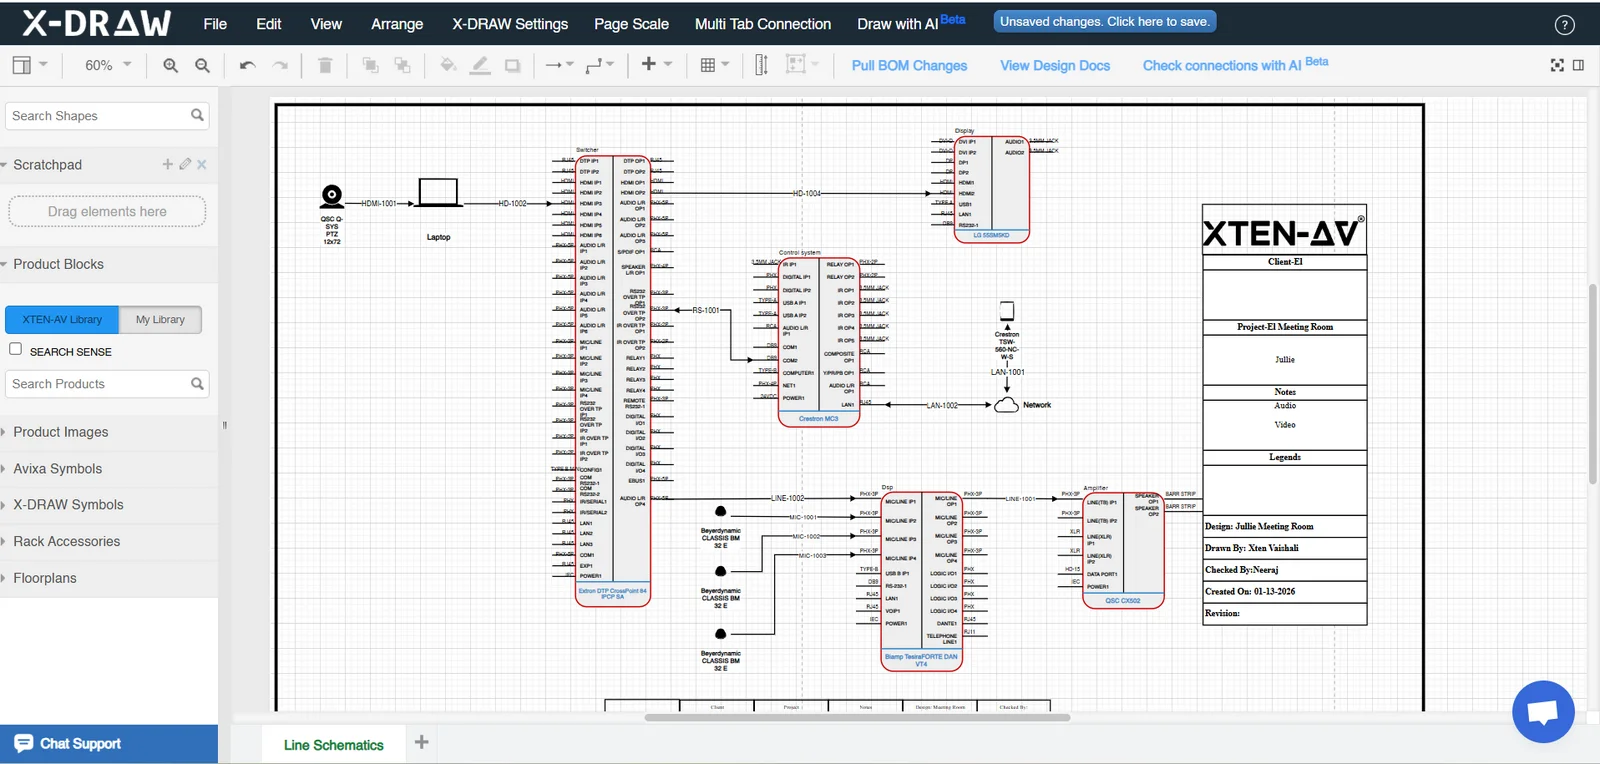
X-DRAW is AV design software built for integrators; it’s where the sports bar TV layout comes together. Start with the venue floor plan, map your AV zones, place displays with clearance rules in mind, and build out the signal flow, all in one coordinated environment.
X-DRAW produces 12 document types, from floor plan layouts to rack elevations, in a single workflow. Changes made in one view propagate throughout the documentation set, eliminating the version control issues that come with managing designs across multiple disconnected tools. As an AV schematic design tool, X-DRAW includes pre-built templates for common sports bar configurations: HDMI matrix, AV over IP distribution, video wall controllers, audio zone layouts with DSP routing, which means integrators aren’t starting from a blank canvas on every project.
Audio Visual Project Proposals That Close Faster with X-DOC
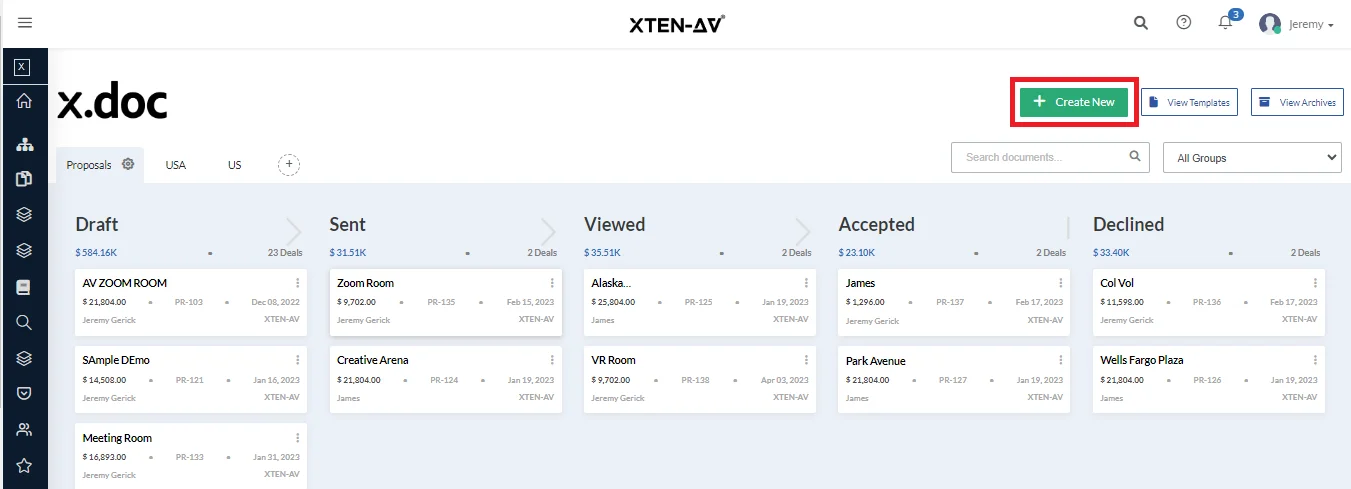
X-DOC is the Audio visual (AV) proposal software that handles the client-facing side of the project. With 100+ audio visual (AV) proposal templates, integrated BOM generation, e-signature capability, and in-platform proposal approval, the gap between completed design and signed contract gets shorter.
For a sports bar client evaluating a full AV investment: displays, mounts, signal distribution, control system, audio infrastructure, a clean, professional proposal with clear pricing and scope accelerates the decision. The client does not need to wait for the Word document to arrive by email. They can review and approve inside the platform.
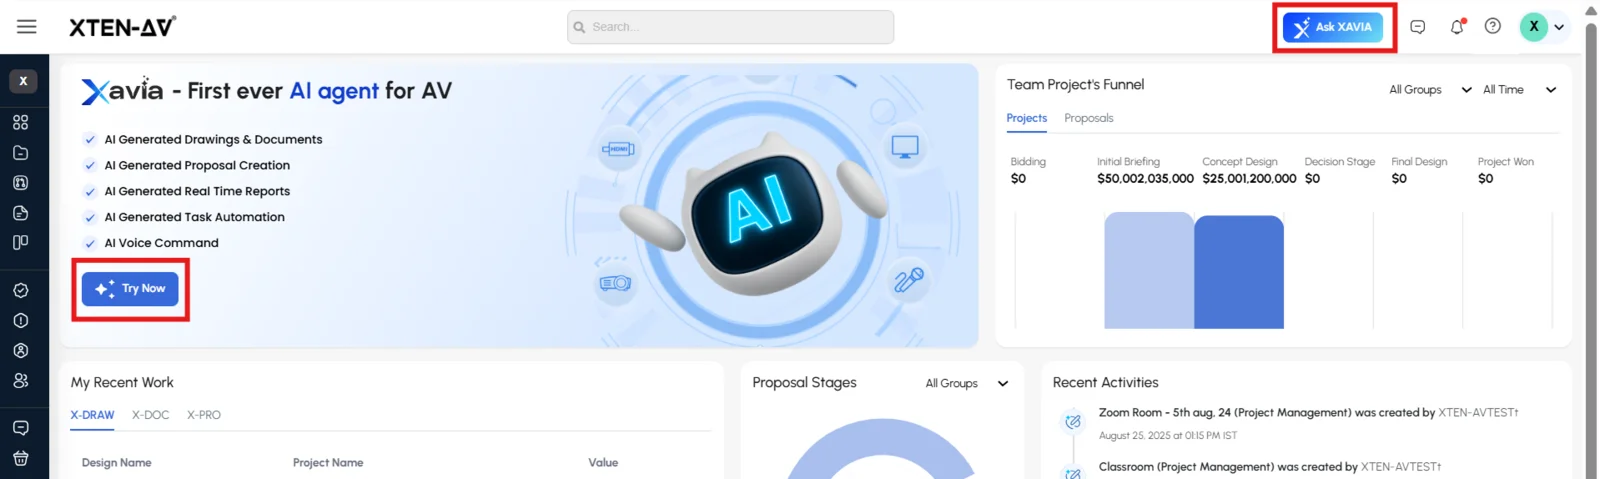
XAVIA: AI-Powered Documentation Support
XAVIA, XTEN-AV’s AI-powered audio visual (AV) workflow assistant, helps integrators move from completed design to client-ready documentation faster. For a sports bar project, that means generating the scope of work for a 24-display AV-over-IP system, populating the signal-flow narrative, and drafting proposal content without having to start from scratch each time.
For a high-documentation project with multiple AV zones, source feeds, and a DSP routing structure to explain to a client, the time saving is significant.
The all-in-one solution for your AV needs
Transform your audio-visual experience with XTEN-AV.
No Credit Card required
Audio Visual System Design Mastery + Winning Proposals = 10x Productivity!
- ✔ Automatic Cable Labeling & Styling
- ✔100+ Free Proposal Templates
- ✔ Upload & Create Floor Plans
- ✔1.5M Products from 5200 Brands
- ✔ AI-powered ‘Search Sense'
- ✔Legally Binding Digital Signatures
Conclusion
A well-designed sports bar TV layout is the difference between a venue that fans keep coming back to and one they visit once. The fundamentals: viewing distance, mounting height, line of sight, AV zone structure, and signal distribution aren’t complicated, but they require deliberate planning from the start of the project.
For AV integrators, sports bar projects are high-visibility work. When the system performs on a packed game night, the venue owner remembers who designed it. Getting the sports bar TV placement, zone audio, and signal routing right matters, and the tools you use to document and propose that system reflect on the quality of the whole job.
XTEN-AV gives AV pros the design infrastructure to handle sports bar AV design with the speed and accuracy these projects demand, from initial floor plan through final proposal.
Want to design your sports bar layout faster?
Use XTEN-AV’s Screen Size Calculator to instantly determine display sizes, then build your full AV design, documentation, and proposal in one platform with X-DRAW, X-DOC, and XAVIA.
FAQ's
For a small- to medium-sized sports bar, the minimum number of displays is 6. Larger venues typically need twelve or more. The real benchmark isn’t a number; it’s sightlines. Every seat should have a clear view of at least two or three screens without craning.
Choosing the best TV size for a sports bar depends on where the screen will be placed. Bar counter seating at 5-8 feet works well with 55-65 inch displays. Mid-room dining at 10–15 feet needs 75-85 inches. Rear seating beyond 15 feet calls for 85-inch commercial displays or a video wall. A simple rule of thumb: optimal viewing distance is roughly 2.5x the screen’s diagonal size.
For seated bar viewers, center the screen at 57–65 inches from the floor. For standing or mixed-height areas, aim for 72–80 inches at center height. Many AV installers set the bottom of the display at 90 inches above floor level and add a 5–8-degree forward tilt to offset the elevation. This helps prevent neck strain for viewers seated directly below.
Most installers follow a standard distance requirement which needs them to install displays at 2.5 times the screen’s diagonal measurement. The 75-inch display requires viewers to sit 11 to 15 feet from the screen. The 4K technology advantage enables users to watch screens from closer distances while maintaining picture quality, benefiting people who work in restricted areas.
Most venues benefit from both. A 2×2 or 3×3 video wall works as the anchor, a shared centerpiece for featured games. The rest of the venue can be managed by a distributed multi-screen system, enabling multiple screens to display different content simultaneously. The two systems work together, not against each other.
You should create a light-source map to help you determine where direct sunlight will hit the screens most brightly. The solution requires commercial displays with anti-glare coatings and brightness exceeding 1,000 nits for areas with high ambient light. The combination of anti-glare window film and adjustable blinds provides a solution for venues that contain large windows. The outdoor patios require displays with a brightness of at least 1,500 nits.
Explore more by topic
AV Design Mastery + Winning Proposals = 10x Productivity!
- Automatic Cable Labeling & Styling
- 100+ Free Proposal Templates
- Upload & Create Floor Plans
- 1.5M Products from 5200 Brands
- AI-powered ‘Search Sense'
- Legally Binding Digital Signatures
No Credit Card Required
Related Blogs
-

- Posted by Sahil Dhingra
Audio Visual A Complete Guide to Commercial AV Companies: What to Expect,...

-
- Posted by Sahil Dhingra
Audio Visual 6 Best Field Service Management Software for Audio Visual (AV)...
-
- Posted by Sahil Dhingra
Audio Visual What Is an AV Connection Check and Why Does It...